Remember the old days? A coach, a bucket of scuffed baseballs, and the hope that a kid’s swing would eventually connect. Those days are as gone as a foul ball into the sun. Now, the modern diamond is a data-driven lab, where spin rate and launch angle are as common as sunflower seeds.
We’ve moved far beyond the old, one-speed pitching machines. Today’s youth training is a mix of advanced tech and smart analytics. It’s not just about throwing fastballs anymore. It’s about using tech to build better hitters and pitchers with precision.
For the 2025 season, the gap between affordable gear and pro-level equipment is getting smaller. You’re now deciding between a single wheel machine for basic reps and a dual-wheel system for big-league movement. This guide is more than a checklist. It’s a playbook for the data-driven era, where a single/dual wheel machine is your new assistant coach.
Forget the old bucket of balls. The future of player development is here, and it speaks in data points.
Machine Types: Wheel vs. Arm, Pros/Cons for Ages 6–12
Choosing a pitching machine for youth programs is more than just speed. It’s about finding the right fit for your team. For kids aged 6-12, the choice often comes down to wheel-based machines or arm-style machines. Each has its own unique approach to training.
The Wheel Deal: Single, Dual, or Triple the Fun
Wheel-based machines are like the Swiss Army knives of the bullpen. They offer reliable, data-driven training for coaches. These machines use spinning wheels to deliver precise pitches, making them perfect for consistent training.
The Single-Wheel Simplicity
Single-wheel machines are simple and affordable, ideal for young players. They provide a consistent pitch at a controlled speed. The Heater Basehit is a great example, focusing on building confidence through repetition.
The Two-Wheel Workhorse
Dual-wheel machines, like the Spinball Wizard, are great for serious training. They allow for independent speed and spin control, simulating various pitches. This is perfect for kids aged 9-12, helping them learn different pitches.
The Triple-Threat: The Spinball Wizard 3
The triple-wheel system, like the Spinball Wizard 3, offers unmatched spin and speed control. It’s ideal for advanced players aged 11-12 who need to master spin. It’s a game-changer for all-star teams but might be too much for younger players.
The Arm-Style Machine: The Vinyl Record of Pitching Machines
The arm-style machine is like the vinyl record in a digital world. It doesn’t just throw; it pitches. With a mechanical arm, it mimics a real pitcher’s motion, creating a natural trajectory.
For youth programs, the arm-style machine is a unique training tool. It allows batters to see the windup and release, just like a live pitcher. The downside is its higher price and more mechanical parts, but it offers a more realistic training experience.
| Feature | Wheel Machine (Dual/Triple) | Arm-Style Machine |
|---|---|---|
| Best For Ages | 6-12 (with speed adjustments) | 9-12 (for realistic pitch simulation) |
| Pitch Type | Consistent, repeatable, programmable | More lifelike, arcing trajectory |
| Maintenance | Low; mostly belt and wheel checks | Higher; mechanical arm requires more care |
| Youth Safety | Excellent (enclosed wheels, auto-feed) | Good, but with moving arm to avoid |
| Best For | High-rep, skill-building drills | Game-simulation & pitch recognition |
So, which is right for your 6-12 year olds? For 6-8 year-olds, a simple machine is best. For 10-12 year-olds, a more advanced machine is needed. The arm-style machine is perfect for 11-12 year-olds, bridging the gap to real pitchers.
Ball Compatibility & Speed Ranges (Youth Settings)
Choosing the right ball is key in youth baseball. It’s not just a piece of equipment; it’s how a young player interacts with the game. Pick the wrong ball, and you might build bad habits or even fear the game. This section will help you pick the right ball and speed for your player.
From Dimple Balls to Real Horsehide
Dimple balls are like training wheels for baseball. They’re soft, light, and slow, perfect for young players. They help kids learn to swing without fear of a fast ball.
As kids get better, they move to safety balls and then real baseballs. A machine that can handle real baseballs is essential. It must be compatible with the ball type.
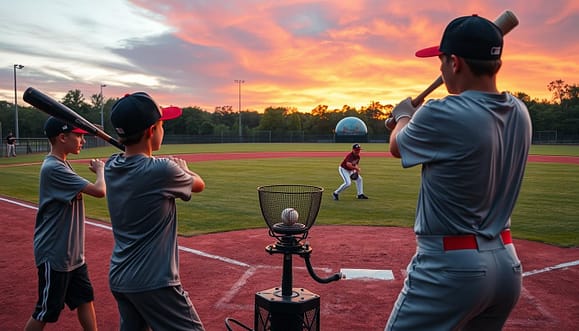
The journey from dimple balls to real baseballs is a big step. Dimple balls and safety balls help build confidence and skills. Make sure your machine can handle the ball you’re using. Some machines are good for all types of balls, while others specialize.
Using the wrong ball in a machine can damage it and be dangerous. It’s important to match the machine to the ball.
Dialing in the Perfect Speed for Development
Speed can intimidate young hitters. The goal is to give them a pitch they can hit, not a fastball from a pro. A machine’s speed range is very important.
The Heater Basehit is great for 9-year-olds, with a top speed of 45 mph. The Heater Deuce is too fast for anyone under 14. Start with a slow pitch and increase the speed as the player gets better.
This isn’t about throwing fast; it’s about giving a hittable challenge. A 12-year-old facing a 60 mph fastball learns timing and pitch recognition. But a 7-year-old might find it too scary.
| Ball Type | Typical Age Group | Material / Core | Machine Compatibility Notes |
|---|---|---|---|
| Dimple / Safety Balls | 4-8 years (Tee-Ball, Coach Pitch) | Foam, Polyurethane | Essential for very young players. Use with machines rated for lightweight balls. The dimples slow the ball and reduce injury risk dramatically. |
| RIF (Reduced Injury Factor) Balls | 7-11 (Youth Leagues) | Cork and rubber center, softer shell | The perfect “bridge” ball. Softer than a real baseball but mimics its flight and weight. Great for machine or coach-pitch practice. |
| Real Baseballs (Hard Balls) | 12+ (Majors, Travel Ball) | Cork and rubber center, wool yarn, horsehide | For advanced youth players. WARNING: Only use with machines specificallly rated for real baseballs. Using a real baseball in a machine not designed for it can damage the machine and is a serious safety hazard. |
Your machine’s ball compatibility and speed settings are key to development. Start with soft, slow balls and increase speed as the player improves. The goal is to build confidence, not fear. A machine that grows with your player is the best investment.
Power, Portability, and Setup Safety
In youth baseball, power isn’t just on the field. It’s also about the pitching machine’s power source. This choice can greatly affect your practice. You’ll need to consider how it gets power, how easy it is to move, and how fast you can set it up.
This is where theory meets the real world. You’ll deal with community ball fields, extension cords, and finding an outlet. It’s all about making the most of your time and resources.
Electric vs. Battery: The Sideline Power Struggle
The debate is between using a wall outlet or a portable battery pack. Electric machines are reliable but tied to an outlet. This limits where you can set up and can be a tripping hazard.
Battery-powered machines offer freedom to set up anywhere. But, they have a limited battery life. This can cut your practice short, leaving you with a dead machine and a frustrated team.
The 10-Minute Setup Challenge
The “10-Minute Setup Challenge” tests your ability to set up quickly. It’s about how fast you can go from car to first pitch. The machine’s design plays a big role in this.
A good machine is easy to set up and safe. Designs like the Heater Deuce are safe and durable. They prevent accidents, like a finger getting caught.
The best machine is one you’ll actually use. A machine that takes too long to set up will be ignored. It’s not just about wheels; it’s about the whole setup process.
| Feature | Electric-Powered | Battery-Powered |
|---|---|---|
| Power Source | 110V Outlet (Corded) | Rechargeable Battery Pack |
| Portability | Limited by cord length (usually 50-100 ft max) | Complete (limited only by battery life) |
| Setup Time | Fast (plug and play, but outlet dependent) | Fast (no cords, but battery must be charged) |
| Practice Flexibility | Restricted to outlet proximity | Full field access |
| Safety Design | Often more industrial, stationary design | Portable designs with safety enclosures (e.g., Heater Deuce) |
The Heater Deuce’s enclosed wheel design is a safety feature. It prevents common injuries. Look for safety enclosures when choosing a machine. They’re important for player safety.
The best machine is the one you’ll use. A machine that’s hard to set up will stay in the shed. The 10-minute challenge tests your whole practice plan. Choose what fits your reality, not what looks good in a catalog.
Feeding Methods & Coach Workload
In youth baseball, a coach’s time is as valuable as a well-thrown pitch. Choosing how to feed balls into your pitching machine is a big decision. It’s about whether you spend your time coaching or feeding the machine.
The debate is between hopper-fed and manual feeding. It’s not just about making things easier. It’s about using practice time wisely to focus on teaching, not just feeding the machine.
Hopper vs. Manual Feed: The Efficiency Equation
Choosing between manual and hopper-fed is like picking between a manual and automatic car. The manual feed is simple but needs constant attention. It turns the coach or a player into a ball-feeder, a task that gets old fast during a 90-minute practice.
A hopper-fed machine with auto-feed is like an automatic transmission. The Heater Basehit, for example, feeds balls every 10 seconds. This means you can get 360 balls an hour without the coach doing anything. It’s a trade-off: more money for the machine upfront, but less time spent on feeding.
| Feature | Hopper/Auto-Feed | Manual Feed | Coach’s Impact |
|---|---|---|---|
| Loading Speed | Automatic (e.g., every 10 secs) | Manual, coach/player loaded | Auto-feed is 3-5x faster, maintaining practice flow. |
| Coach Involvement | Minimal (load hopper, press start) | Constant (every single pitch) | Coach is freed to instruct, not just load. |
| Cost (Time & Money) | Higher upfront machine cost | Lower upfront cost | Auto-feed pays back in saved coaching hours. |
| Best For | High-rep drills, large groups, solo coaches | Low-budget, small groups, or infrequent use | Choose based on practice size and coaching style. |
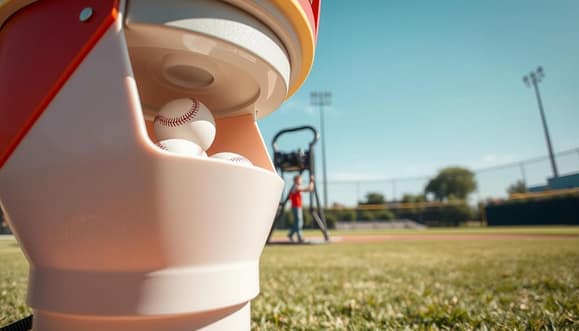
Auto-feed systems like the Heater Basehit are more than convenient. They’re game-changers. They free up the coach to focus on what really matters: teaching.
With a system like the Heater Basehit, the coach can watch a player’s swing while the machine feeds the next pitch. This means more quality swings, more focused coaching, and a coach who’s not tired from feeding the machine.
Time is the most valuable thing in a youth practice. An auto-feed system is an investment in quality coaching time. It’s a simple equation: more pitches, less fetching. More coaching, less loading. It’s a win-win for player development.
Pairing With Tech: From Pocket Radar to Simulation
Forget the old idea of a pitching machine as a solo robot. In 2025, it’s just the arm. The brain is the tech you pair with it. We’ve moved beyond just hearing a thwack.
Today, the magic is in the data-driven, instant feedback loop of sports tech. It’s not just about hitting balls. It’s about gathering data, from a 10-year-old’s grip to their final swing’s exit velocity.
This turns practice from repetition to revelation. By adding technology, you’re not just running drills. You’re building a data-rich profile of each athlete’s growth.
Let’s explore from simple tools to immersive tech, building your own ecosystem.
The Data Trifecta: Radar, Sensors, and Sims
Think of your tech stack as a pyramid. At the base is immediate, tangible feedback. At the peak is immersive simulation. It starts with a simple question: “How fast?”
A pocket radar gun is the first step into baseball analytics. It’s the instant-gratification tool. A young pitcher works on their mechanics, and they see a hard number.
This instant, objective feedback is a powerful motivator. It turns effort into a number, and numbers are a language kids love to compete with.
The next level introduces sensors. We’re past guesswork on swing mechanics. Technologies like Blast Motion sensors or Rapsodo’s pitch and hit tracking give a detailed breakdown of the action.
We’re talking about spin rate on a curveball, bat speed, attack angle, and launch angle. For a young hitter, seeing their best contact is a target. It moves coaching from “keep your elbow up” to “let’s get your average launch angle from 8 to 15 degrees to drive the ball.”
From Pocket Radar to HitTrax-Style Simulation
This is where we ascend to the simulation promised land. This isn’t just tracking; it’s world-building. HitTrax-style systems are the ultimate synthesis.
A hitter steps in, and the machine fires. They swing, and instead of a ball just hitting a net, the system calculates the exact trajectory, distance, and even the defensive play that would result in a real field. That line drive to the gap? It’s a stand-up double off the wall at Fenway Park, rendered on a screen in real-time.
This is the “custom gear revolution” in action. It’s no longer just about the swing; it’s about the scenario. You can set it to “bottom of the 9th, bases loaded, down by one” and put the player in a high-pressure simulation.
For youth players, this gamification is everything. It’s the difference between doing math homework and playing a video game that teaches you calculus. The engagement is off the charts because the feedback is immediate, visual, and contextual. It’s not just hitting a ball; it’s winning a game.
To make sense of this tech ecosystem, here’s a breakdown of the key players and what they bring to your training environment:
| Technology | Primary Function | Key Data Points | Best For Youth Training |
|---|---|---|---|
| Pocket Radar | Instant velocity feedback for pitches or batted balls. | Pitch velocity, exit velocity. | Building velocity awareness and celebrating incremental speed gains. |
| Swing Sensors (Blast, Rapsodo) | Attaches to bat to analyze swing mechanics. | Bat speed, attack angle, rotational acceleration. | Correcting swing plane and improving bat path efficiency. |
| Pitch Tracking (Rapsodo, TrackMan) | Analyzes pitch movement and spin. | Spin rate, spin axis, break (in/out, up/down). | Teaching young pitchers how spin affects movement. |
| HitTrax-Style Simulation | Projects at-bat outcomes in a virtual stadium. | Launch angle, distance, hit probability. | Building situational awareness and competitive at-bats. |
Integrating these tools with your batting cage machine creates a seamless training loop. The machine feeds the pitches, and the tech suite captures and analyzes every outcome. The goal is to move from blind repetition to targeted, data-informed development.
For a coach, it’s the difference between saying “good swing” and saying, “Your launch angle on that last drive was 18 degrees, and if you maintain that, you’ll hit 15 more line drives this season.” That’s the power of pairing the right machine with the right tech.
Warranty, Service & Total Cost of Ownership
The price you see on a pitching machine is just the start. The real cost is a long-term deal with a warranty and your wallet. It’s not just a machine; it’s a partnership that lasts years.
Think of the warranty as a report card from the maker. A 90-day warranty on a $1,500 machine is a warning. It says, “We’re not sure this will last a full season.” On the other hand, a three-year warranty shows the company’s commitment.
Decoding the Warranty Fine Print
Don’t just look at the warranty length. Check what it covers. A good warranty includes parts and labor for a certain time. Some warranties cover parts but not labor, which can cost a lot.
For example, the Spinball Wizard Pro has a 1-year commercial warranty. This shows it’s built to last. Here’s what to look for:
- Parts vs. Labor: A “parts-only” warranty means you pay for labor.
- Exclusions: “Wear items” like tires and belts are often not covered. Are they easy to replace?
- Transferability: If you sell the machine, does the warranty stay with it?
A cheap machine with a short warranty can break early. This means you might need to buy a new one or fix it for a lot of money. That “budget” buy can quickly become expensive.
Let’s look at the numbers. This is a financial reality check. We’ll compare a cheap machine at $1,200 with a more expensive one at $2,500 over five years.
| Cost Factor | “Budget” Machine ($1,200) | “Pro-Sumer” Machine ($2,500) |
|---|---|---|
| Initial Purchase | $1,200 | $2,500 |
| Warranty Period | 90 days | 3 years (parts & labor) |
| Year 2 Repair (Motor) | $350 (out-of-warranty) | $0 (under warranty) |
| Year 3 Repair (Feed System) | $275 | $0 (under warranty) |
| Year 5 Replacement | Full replacement needed (~$1,200) | Routine maintenance only |
| Total 5-Year Cost | ~$3,025 | ~$2,500 |
The cheap option can be a financial trap. The more expensive machine costs more upfront but saves money in the long run. It gives you reliable service for years.
Service costs are often hidden. A good service network is priceless when your machine breaks. A cheap machine with no support is a waste of money. The real cost includes repairs, downtime, and replacements over time. Buy for the long term, not just the short term.
Use Cases: Repetition Drills vs. Mixed Pitch Development
In youth baseball, the debate is not just about fastballs and curveballs. It’s about whether to focus on repetition or adapt to the game’s unpredictability. The answer lies in a mix of both. This isn’t just about using a machine; it’s about using it wisely.
We’re moving away from the “set it and forget it” mindset. Instead, we’re creating a smart practice plan. This plan is designed to improve your game.
The 100-Fastball Drill vs. Mixed-Sequence Pitching
Repetition is like practicing scales for a musician. The “100-Fastball Drill” is a way to build a strong swing. A machine, like those in our guide to the best pitching machines for youth, is great for this. It provides consistent, grooved fastballs.
This drill helps build muscle memory and hand-eye coordination. It’s the foundation of a good swing. It’s about reacting, not thinking.
But games aren’t metronomes. Pitchers throw different speeds and types of pitches. This is where mixed-sequence pitching comes in. It’s like cognitive training for the batter.
Instead of just fastballs, a mixed-sequence program throws different pitches. This makes the batter think and adjust their swing. It’s like learning to play a symphony, not just one note.
Building a Weekly Machine Practice Plan
So, how do you balance repetition and mixed-sequence pitching in a week? The key is periodization. This means alternating between repetition and simulation.
Here’s a sample weekly plan that balances both:
| Day | Focus | Machine Setting | Drill Type | Mental Focus |
|---|---|---|---|---|
| Tuesday (Technique Day) | Mechanics & Muscle Memory | Single-pitch setting (e.g., fastball, center-cut) | Repetition (100-pitch drill) | Consistency, swing path, form |
| Thursday (Recognition Day) | Pitch Recognition & Timing | Programmed mixed sequence (e.g., fastball, change-up, fastball, curve) | Mixed-Sequence Pitching | Reaction, decision-making, plate discipline |
| Saturday (Game Day Sim) | Game Simulation | Randomized sequence with varying speeds and locations | Live-At-Bat Simulation | Game-like pressure, pitch recognition under fatigue |
This table shows how the focus shifts throughout the week. The goal is to build a strong swing (Tuesday), then apply it to game-like scenarios (Thursday and Saturday). A machine like the Junior Hack Attack is perfect for this, with its programmable arm slot and pitch variety.
The debate isn’t just “repetition vs. recognition.” It’s about using repetition to build the swing and mixed-sequence pitching to teach when and how to use it. It’s the difference between a batter with a pretty swing and a smart, adaptable hitter. Your pitching machine is a coach, not just a ball launcher. Use it to build the swing, then test the batter’s mind.
Purchase Checklist & Questions for Vendors
So you’ve done your homework. You know the difference between arm and wheel machines. You’ve also thought about dual wheels versus a single arm. Now, it’s time to negotiate, inspect, and separate the sales talk from the real deal. Don’t just buy a machine; invest in a system for player development. This means having a detailed checklist and the right questions to ask.
The Pre-Purchase Interrogation
Before you sign anything, ask specific questions. This isn’t just any equipment; it’s a training tool that will be used a lot. Be like a mechanic and ask the questions the brochure won’t answer. Ask about the motor’s duty cycle for long, intense drills. Can you see the service manual for the gearbox or wheel assembly? How many pitches can the feeder handle before it jams?
Request the technical specs for the DC motor’s amp draw and duty cycle rating. This isn’t being picky; it’s being smart with your budget. If the vendor can’t or won’t answer, that’s your first warning sign.
The Final Walk-Around Checklist
Before you buy for your youth program, do a final check. This is your last chance to avoid a big mistake.
- Mechanical Guts: Can you see the internal parts? Is it built well or like a toy?
- Ball Feed Reliability: Does the feeder work with the balls or baseballs you’ll use every day?
- Power & Portability: Does the power system fit your setup? Is the cart sturdy or an afterthought?
- Tech Handshake: If it connects with apps or radar, test it live.
- Warranty & Service: What does the warranty really cover? Is there a local service network? Get it in writing.
- The Noise Test: Turn it on. A youth baseball practice is loud enough. If it’s too loud, your players won’t hear you.
Buying a pitching machine for youth baseball is more than just a purchase. It’s a commitment to a training philosophy. Use these questions and the checklist to make sure you’re investing in a system that will improve your players.