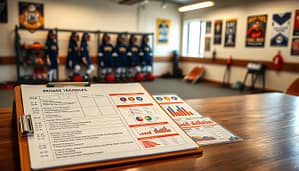
Coaching a 10U team without a clear plan is tough. It’s like trying to build IKEA furniture with just the warranty card. You’ll end up with a mess and feel really frustrated.
Our role is more than just managing a team. We need to create a skill progression that fits young athletes’ growth. We’re building the base for their future in sports.
Forget the “try hard” advice. Success at this age means more than just trying. It’s about mastering skills, like the crow hop, or understanding game strategies. It’s also about loving the game, even when things go wrong.
We look to top models for guidance. They focus on Physical, Mental, Tactical, and Emotional growth. It’s not about winning games. It’s about growing as athletes.
The key is a weekly curriculum. It’s like updating your player’s software to make them better. Let’s set clear goals for our young players.
12-week overview: themes and objectives
Thinking of your 12-week season like a Fortune 500 fiscal year might seem extreme. But, imagine trying to manage a team without a plan. It’s chaotic and doesn’t help anyone grow.
This overview is the solution. We’re creating a story, not just random drills. It’s like a three-act play for athletes.
Using a corporate analogy helps because it makes planning essential. You wouldn’t launch a product without a plan. Why not treat young athletes the same way?
Our season is divided into three parts. Each part has its own theme. They build on each other, helping players grow from beginners to skilled athletes.
| Quarter / Phase | Weeks | Core Theme | Primary Objectives |
|---|---|---|---|
| Q1: System Installation | 1-4 | Foundation & Fundamentals | Establish routine. Install basic throwing, fielding, and hitting mechanics. Build team culture. Safety first. |
| Q2: Complexity & Competition | 5-8 | Applied Skills & Game Context | Introduce situational drills. Add baserunning IQ. Begin controlled scrimmages. This is where your 10U practice plan shifts from “how” to “when and why.” |
| Q3: Performance & Polish | 9-12 | Integration & Execution | Refine skills under pressure. Run full defensive scenarios. Optimize lineup strategy. Prepare for season finale. |
Look at the growth? Q1 focuses on building the foundation. We’re setting up the basics. Every action is part of a pattern.
Q2 adds complexity. Now, we teach them when to throw. It’s not just about catching a ball. It’s about catching it with strategy.
Q3 is the final test. Can they handle the game’s pressure? The skills are now tools for solving problems.
This structure avoids common mistakes in youth sports. It ensures players develop evenly. Each week’s theme helps balance their growth.
A good 10U practice plan is flexible but focused. It’s a journey from “Throwing with Purpose” to “Situational IQ.” Every practice is a chapter in the season’s story.
You’re not just coaching baseball. You’re writing a story where the kids are both the authors and the heroes. The 12-week arc ensures it has a satisfying ending.
Anatomy of practice: warmup, stations, competition, review
In youth sports, the most important role is the director, not the star player. Your practice plan is like a script, setting up the action. If done right, it turns into a masterpiece of skill and fun.
For 10U baseball, this masterpiece must fit in 90 minutes. Old methods, like long lines and bored players, are outdated. We’re moving to a system that values attention and skill.
The Non-Negotiables: From Early Activity to the Final Debrief
The “Eight Absolutes” are the rules of a good practice. They make drills flow into a story.
Early Activity is a key move. It’s not just batting practice. It’s a fun way to start on time. Kids start playing catch, and soon everyone joins in.
The Warm Up is next. We move to throw, not just throw to warm up. It’s about getting ready, not just stretching.
The sequence then builds up. We start with general movement and add sport-specific skills. The magic happens in the sixth absolute.
Drills/Station Instruction is the main event. It’s where we start the dialogue. Then, Baserunning/Conditioning tests skills under fatigue. The Mental/Finish debrief wraps it up.
How does this compare to the old way? Let’s look at the numbers.
| Practice Segment | Traditional Model | DC Advanced “Eight Absolutes” Model |
|---|---|---|
| First 10 Minutes | Coach sets up, kids run laps. | Early Activity: Self-directed skill play. Engagement from minute zero. |
| Skill Development | One-line drills, high wait time. | Rotating station work. High repetitions, low wait time. |
| Coach’s Role | Lecturer, primary demonstrator. | Facilitator, roving expert, quality controller. |
| Player Engagement | Sporadic, dependent on turn. | Constant. The TikTok brain stays hooked. |
| Outcome | Some skill practice, possible boredom. | Maximized touches, cognitive investment, team culture. |
Why Station Work is Your Secret Weapon
Station work is your teaching superpower. It’s like moving from a big lecture hall to a small seminar. For a 10-year-old, it’s essential.
Station work fights wait time and boredom. It turns one coach into four with the help of parents. This is a game-changer.
The benefits are huge. Kids get more reps in less time. They stay engaged, processing new tasks every 10-12 minutes.
It also allows for teaching each player differently. Struggling fielders get extra help, while stars get advanced challenges. It’s not teaching to the middle anymore.
Managing this flow is your chance to shine. With clear cues and helpers, you create a productive, focused environment. It’s the sound of learning.
So, a perfect practice isn’t a mystery. It’s a well-designed plan. It starts with the “Eight Absolutes” and comes alive with station-based learning. This is how you build ballplayers, one minute at a time.
Drill menu: throwing, fielding, hitting, baserunning
If your practice plan were a mixtape, would it be a timeless classic or a collection of forgotten B-sides? Every coach has a library of youth baseball drills. The secret is knowing which ones to repeat.
This section is like your curated coaching playlist. We’re focusing on what makes a drill effective. What’s the goal? Where do kids struggle? And what’s the key to understanding?
Building Your Coaching Playlist: Drills That Actually Work
Let’s break down the four pillars of skill development. Each area needs specific attention. Generic exercises won’t do. Players need targeted repetition for game situations.
Throwing Drills: Beyond Catch
Simple catch is basic, but it’s not enough. We need drills that teach proper footwork and arm path. The “Four-Corner Relay” forces kids to move before throwing.
The DC Key is rhythm. Feet set the tempo, and the arm follows. A good throw is timed, not just strong.
Fielding Drills: From Static to Dynamic
Stationary cone drills are like learning chords. But we need to play a song. Fielding drills should progress to attacking ground balls.
The “Attack and Gather” drill removes the cone. A coach rolls a ball, and the fielder must charge and field with two hands. The failure point is usually the approach.
The DC Key is the first step. A positive, aggressive first step toward the ball sets up everything else.
Hitting Drills: Bridging the Gap
This is where most plans fall apart. We jump from tee work to live pitching, and mechanics melt down. The bridge is key. Soft toss from the side is a good start, but it’s not enough.
The “Front-Toss Reaction” drill adds a timing element. A coach tosses from behind a screen directly in front. The hitter must recognize speed and location. The common failure is pulling the head or lunging.
The DC Key is the “quiet head.” If the head stays steady through the swing, the body can adjust.
Baserunning Drills: More Than Sprints
Baserunning is essential but often overlooked. It’s about leads, reads, and turns, not just speed.
The “Read and React” drill uses a coach’s signal. Runners take their lead, then react to a simulated hit. The failure point is the secondary lead after the pitch.
The DC Key is the “shuffle and gather.” A proper secondary lead uses controlled shuffles, not a reckless sprint.
| Skill Area | Drill Name | Primary Focus | DC Key |
|---|---|---|---|
| Throwing | Four-Corner Relay | Footwork & Timing | Rhythm: Feet set the tempo |
| Fielding | Attack and Gather | Aggressive Approach | The First Step: Positive movement toward the ball |
| Hitting | Front-Toss Reaction | Pitch Recognition | Quiet Head: Steady head allows body adjustment |
| Baserunning | Read and React | Lead & Decision Making | Shuffle & Gather: Controlled secondary lead |
Curating the Repetition: Quality Over Quantity
Most youth baseball drills are performed poorly. Kids go through the motions, not to improve. Your job is to enforce quality.
Quality repetition is slow at first. It focuses on one specific cue. It includes immediate, specific feedback. And it stops when form breaks down.
A common mistake is running a drill for ten minutes straight. The first two minutes might be quality. The next eight are garbage. Better to run a drill for three focused minutes, take a break, then run it again.
The magic isn’t in the drill itself. It’s in how you frame it. Before starting any station, name the single most important thing. “Today, on every throw, I want to see your back foot pointing at your target.” That’s the DC Key in action.
Your practice planning should include these intentional cues. Write them on your template. Remind your helpers. Stop the group if needed. Quality repetition builds neural pathways. Sloppy repetition just builds bad habits.
Remember: you’re not just running drills. You’re building skills. Choose your playlist wisely, conduct with intention, and watch your players develop their own rhythm.
Pitching and arm care specific to 10U
In the travel ball world, the 10U arm is seen as a valuable asset. But it’s not about making the next big star. It’s about keeping kids safe and healthy for the future.
Protecting young arms is key, not just for now but for their future. Think of your role as a guardian, not just a coach. Your main goal is to help the kid succeed in high school, not just win tournaments.
The Young Arm: An Asset, Not a Liability
Young arms are treated like hot stocks in travel ball. But unlike stocks, a torn UCL is a serious injury. At 10U, arms are like raw materials that need care.
It’s not about how fast a kid throws. It’s about having good mechanics and a healthy arm. The kid who throws well but safely will have a better future.
The key to success isn’t how fast a kid throws at 10. It’s if they can pitch safely at 16. We’re playing the long game, even if it’s not popular.
Implementing a Responsible Throwing Program
Creating a safe pitching program is important. It’s about being smart, not just about winning. A good program has three main parts: checking how the arm works, managing how much it throws, and making sure it recovers.
First, you need to check how the arm works. This isn’t about finding problems. It’s about knowing the arm’s baseline. This helps you understand its natural movement and current strength.
Next, you need to manage how much the arm throws. Pitch counts are not just rules. They help keep the arm safe. The table below shows a safe throwing plan that builds strength without risking injury.
| Phase | Focus | Weekly Throwing Volume | Intensity Level | Recovery Days |
|---|---|---|---|---|
| Foundation (Weeks 1-4) | Mechanics & Posture | 60-80 throws | Low (50-60% effort) | 2-3 |
| Development (Weeks 5-8) | Accuracy & Consistency | 80-100 throws | Medium (60-75% effort) | 2 |
| Integration (Weeks 9-12) | Game Situations | 100-120 throws | Medium-High (75-85% effort) | 1-2 |
| Maintenance | Health & Refinement | 80-100 throws | Variable (situation-based) | 2 |
This plan focuses on building strength, not just speed. It’s about gradual increases, not sudden jumps. This way, the arm gets stronger without getting hurt.
Recovery is also key. It’s not about fancy treatments. It’s about simple habits that keep the arm healthy.
Before throwing, kids should do a warm-up. This includes arm circles, shoulder taps, and torso twists. It’s like putting on a glove—it’s essential.
- Dynamic warm-up: Arm circles, shoulder taps, torso twists (5 minutes)
- Light resistance band work: No heavy weights, just activation (3 minutes)
- Gradual long-toss progression: Starting at 30 feet, working out gradually
After throwing, kids need to cool down. This includes jogging, stretching, and drinking water. It’s simple but important.
- Immediate light cardio (jogging) to flush the arm
- Gentle stretching focusing on shoulders and back
- Simple hydration check—if they’re not peeing clear, they’re behind
- 24-hour rule: No overhead throwing the day after pitching
This isn’t rocket science. It’s just common sense. But in travel ball, people often skip these steps to focus on winning.
Velocity is important, but not at 10U. At this age, it’s about building strength and good mechanics. Forcing kids to throw too hard can hurt their arms.
The phrase “he’s just a natural” is dangerous. Talent without training is like finding gold and leaving it out. It loses value.
Your pitching program should be consistent. The same warm-up, the same throwing plan, and the same recovery routine. In a world that loves highlights, being consistent is radical.
You’re not just coaching. You’re preserving a future. The real trophy is when the kid makes varsity in high school. That’s what matters.
Small-sided decision games for game IQ
Ever seen a player ace a drill, then mess up in a game? It’s like they forgot their own name. This is the “drill robot” in action, perfect in repetition but clueless in games.
It’s not about skill. It’s about understanding the game’s context. Drills teach the how. Games teach the when and why. To bridge this gap, we need chaos, not more drills.
Shrinking the Field to Expand the Mind
Imagine a 6v6 scrimmage for 10U players. It’s chaotic but sparse. A player in right field might get one play all inning. But shrink the field to 3v3 in the infield only. Now, every player is in every action.
This setup boosts tactical skills. We’re not just building physical strength. We’re sharpening minds. With fewer players and a smaller field, decisions come faster. This makes learning more intense and teachable.
The pressure is real, but it’s for practice. It’s a chance to test baseball smarts.
From Drill Robots to Baseball Thinkers
Transformation begins in these mini-games. A shortstop isn’t just catching a throw. They’re making quick decisions about the runner and the ball. A baserunner isn’t just waiting for a signal. They’re reading the pitcher and making split-second choices.
These moments turn coaching points into real-life lessons. The lightbulb moments happen on the field, not in lectures. Here are some formats to make practice a decision-making hub:
| Game Format | Players | Primary Focus | Key Decision Forced |
|---|---|---|---|
| Infield Rundown | 3v3 (Infield only) | Fielding communication & run-downs | “Do I apply the tag now, or keep the runner in a pickle?” |
| First-to-Third Derby | 4v4 (Batter, runner, 2 infielders, 1 outfielder) | Hitting placement & baserunning reads | “Do I try for third on this hit to right field, or hold at second?” |
| Pressure Cooker Defense | 3v2 (Infield vs. Runner & Coach-Hitter) | Force play decisions & quick throws | “With a runner on first, do I go to second for the force, or take the sure out at first?” |
| Small Ball Scramble | 5v5 | Bunt defense & situational awareness | “Is the bunt for a hit or a sacrifice? Who covers what base?” |
Each game focuses on a specific baseball intelligence challenge. With fewer players, there’s no place to hide. Success means making the right move under pressure.
Run these games for 10-15 minutes. You’ll learn more about your players than in a month of drills. You’ll see who has natural field awareness and who needs to learn. Kids will stop just following commands and start thinking like baseball thinkers.
The drill robot is gone. Welcome to the world of smart, quick thinking.
Workload management and simple recovery habits
Many think sports science is only for pros. But my 10U team shows it’s for young athletes too. We’re talking about too much practice, games, and activities. It’s not just about playing hard. It’s about resting well too.
Elite sports use a quarterly model that works for youth baseball. It’s about changing the workload to help the body adapt. It’s like pacing schoolwork, not cramming it all in at once.
Monitoring the Engine: Avoiding Physical and Mental Burnout
Burnout in young players is different from adults. It might look like a player forgetting how to throw. Or a kid not wanting to play. These signs show they’re tired, both physically and mentally.
Physical fatigue is easy to spot: sore muscles, tired legs. But emotional fatigue is sneaky. It’s the stress of playing well and the team’s social dynamics. We watch for kids who seem tired for two practices in a row.
Studies show that recovery is when skills really stick. Without breaks, players just get more tired. Their bodies and minds can’t keep up. And they might lose their love for the game.
The Art of the Deload Week
The deload week is not a break. It’s a time to reduce how much and how hard we play. We cut back on throwing and focus on fun games. It’s about enjoying the game, not just playing it.
Parents worry about losing skills. But the opposite happens. Players get better after a break. It’s not laziness. It’s a chance for skills to really stick.
| Recovery Area | Common Mistake | Better Habit | Why It Works |
|---|---|---|---|
| Hydration | Relying on sugary drinks like Capri Sun during practice | Pre-hydration with water 2 hours before, electrolyte solution during intense sessions | Maintains cognitive function and prevents early fatigue; sugars cause energy crashes |
| Sleep | Irregular bedtimes, specially before game days | Consistent 9-10 hour sleep schedule, no screens 1 hour before bed | Growth hormone releases during deep sleep; memory consolidation happens overnight |
| Nutrition | Post-game pizza as the primary recovery meal | Protein + carb snack within 30 minutes (chocolate milk, yogurt & fruit) | Replenishes glycogen stores and repairs muscle micro-tears efficiently |
| Active Recovery | Complete inactivity on off days | Light movement (walking, swimming, playing catch at 50% effort) | Promotes blood flow to clear metabolic waste without adding stress |
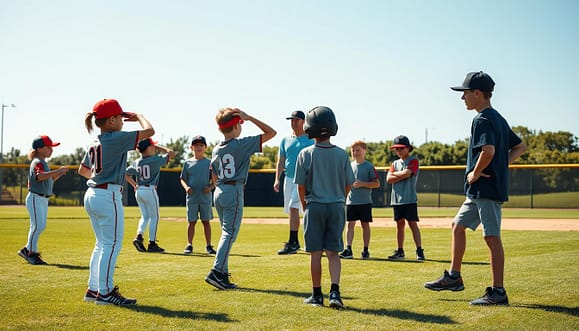
Hydration starts at home, not at the field. Water bottles are as important as gloves. Sleep is key. A well-rested player learns faster than an exhausted one.
Nutrition battles cultural habits. We keep the pizza tradition but add real food first. A protein shake or sandwich after the game helps.
Recovery habits are key to skill development. They’re not exciting but essential. Managing workload and recovery helps athletes grow, not just play.
Assessment rubrics at weeks 1, 6, and 12
Coaching isn’t just about feelings. It’s about facts and data. A 10U practice might look chaotic, but it’s all about the numbers. “Billy’s getting better” feels good, but “Billy’s throwing velocity increased by 3 mph” changes everything.
We’re setting up clear assessment rubrics at weeks 1, 6, and 12. It’s like a quarterly report for your little league team. The numbers don’t lie.
Moving Beyond “He Looks Good”: Objective Metrics for Subjective Skills
That perfect swing? Let’s measure it. That smart baseball IQ? Let’s test it. We’re moving from art to science. The goal is to show growth in a way everyone can see.
So, what are we measuring at weeks 1, 6, and 12? We’re looking at both physical skills and brain power:
- Throwing & Fielding: Velocity (mph), accuracy percentage to a target, successful catch rate on fungos
- Hitting: Contact rate on pitched balls, quality of contact (hard/medium/soft), bunt execution success
- BaserunningHome-to-first time, secondary lead consistency, situational decision accuracy
- Situational Awareness: Quick quiz on defensive responsibilities, “what would you do here?” scenarios
Make a simple rubric for each player. Use a 1-5 scale for skills like “follows through on throws.” For numbers, record them. This turns coaching into a results-oriented business.
When you compare week 1 to week 12, you’ll see real progress. A line graph showing a kid’s catch rate going up? That’s gold. It proves your coaching is working, not just a feeling.
The Benchmark Meeting: Communicating Player Growth
Now, you’re the CEO of your 10U team. Have a “State of the Program” meeting after each assessment. Review the benchmarks.
First, look at team trends. Is everyone struggling with bunting? Are throws consistently short? This guides your practice plans.
Then, check individual player cards. Look for:
- Dramatic improvements to celebrate
- Stagnant areas needing work
- Unexpected strengths to use
- Consistent weaknesses needing drills
This meeting isn’t about more work. It’s about smarter work. If three players have the same throwing issue, fix it all at once. Efficiency through analysis.
Share this growth with players and parents. Use simple, visual reports. A green “↑” arrow for throwing accuracy. A star sticker for defensive smarts.
The benchmark meeting turns vague praise into real recognition. Instead of “good job,” it’s “your elbow work increased your catch rate by 25% this month.” That’s coaching that sticks.
Remember, these rubrics are roadmaps, not report cards. They show where we’ve been and where we’re going. In a world of participation trophies, they offer something better: measurable proof of getting better.
Coaching points and common fixes
Coaching at the 10U level is like working in a pediatric emergency room. You’re not doing elective surgeries. You’re doing triage. Kids come in with symptoms like a hitch in their swing or a flinch when they see a grounder.
Your job is to stop the bleeding and get them functional. You need to diagnose before you can treat.
The Field Surgeon: Diagnosing and Treating the Youth Swing (and Other Ailments)
When a swing looks broken, don’t ask how to fix it first. Ask why it’s broken. I find flaws in three areas: technical, fear-based, or strength-related. Misdiagnosis can ruin a season.
Technical flaws are errors in movement. Hands drop, hips open too early, back elbow flies out. These are problems of know-how.
Fear-based reactions are self-preservation. Kids close their eyes on fly balls or bail out of the batter’s box. They’re not making mistakes. They’re surviving. You can’t coach technique until you address their fear.
Strength issues are often mistaken for technical ones. A child might not swing well because they lack core strength. No cue can fix underdeveloped muscles.
I learned a hard lesson from a player with a bad swing. We worked on posture and balance, but nothing worked. It turned out he needed new glasses. His swing improved after that.
Always check the simplest explanation first. Is the equipment too heavy? Can they see the ball? Don’t rewrite their motor program until you rule out the obvious.
The DC Keys: Shortcut Phrases for Instant Understanding
Coaching 10-year-olds is tough because their working memory is full. Your coaching points must be simple, visual, and immediate. I call these DC Keys—shortcut phrases that bypass the cognitive overload.
For the “shot-put” throwing motion, forget about “external rotation” or “scapular loading.” Try this: “Show your back pocket to second base, then show it to the catcher.” This creates the correct arm path instantly.
Here’s a quick-reference table for common ailments and their DC Key fixes:
| Symptom | Likely Cause | DC Key Fix (The Simple Cue) |
|---|---|---|
| “Hitch” in swing (hands drop before swing) | Technical / Timing | “Load your hands into the catcher’s mitt.” |
| Fear of ground balls (flinching, eyes closed) | Fear-Based | “Watch the ball hit your glove. Just be a camera.” |
| Poor baserunning leads | Technical / Awareness | “Take a walking lead, like you’re stealing a cookie.” |
| Stiff, inaccurate throwing | Technical / Strength | “Throw with your belly button.” (Promotes trunk rotation) |
The power of a DC Key is its specificity. “Swing harder” is noise. “Hit the back of the baseball” is a directive. It gives their brain a single, achievable target. You’re not teaching biomechanics. You’re programming a better outcome.
Remember, your voice is the operating system for their young athletic hardware. Keep the commands simple, visual, and positive. The fix is usually one clear phrase away.
Parent helpers and station logistics
Your most valuable coaching resource isn’t in the equipment bag; it’s on Instagram. Managing adults is harder than coaching kids. You’re teaching them to field grounders while you manage volunteers.
It’s not about finding assistant coaches. Those are rare. You need to use the parents who are already there. Look for helpers who can manage a station for 15 minutes without help.
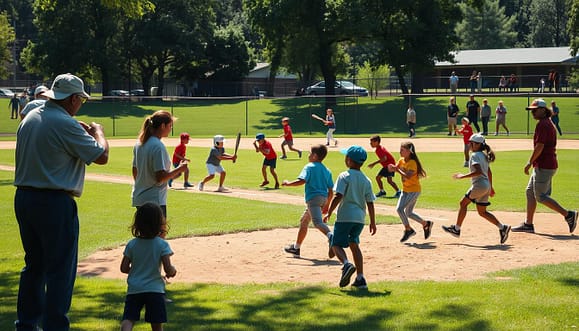
Managing Volunteers: From Reluctant Dads to Empowered Assistants
Start with small asks. Don’t ask for a big commitment right away. Begin with simple tasks like holding a bucket of balls.
Make the onboarding process easy. I use a three-step system:
- The 30-Second Brief: “You’re at hitting station. Feed the tee. Watch for stepping in the bucket. Say ‘Good swing’ a lot.”
- The Cheat Sheet: Laminated drill cards with simple diagrams and key coaching points.
- The Escape Hatch: “If you get confused, just have them play catch until I check in.”
Give them permission to make mistakes. “If you’re not sure, just say ‘Let’s try it again’ and wave me over.” This makes them confident.
Remember, parent helpers are truly the saviors of the game. They’re not just filling a slot; they’re enabling small-group instruction.
The “Hat Rule” and Other Boundary-Setting Protocols
Coach Duke taught me The Hat Rule. It’s simple. When my coaching hat is on, I’m Coach. When it’s off, I’m Dad.
This rule works for parent helpers too. Give them a special hat or vest. It shows who’s coaching and who’s parenting.
Other rules that help:
| Protocol | Purpose | Implementation |
|---|---|---|
| Post-Practice Debrief | Contains feedback to designated time/place | 5 minutes after practice ends at home plate only |
| The 24-Hour Rule | Prevents emotional reactions | All non-urgent concerns must wait one day |
| Station Rotation Sheets | Eliminates confusion about responsibilities | Printed schedule with helper names and locations |
Station logistics need to be precise but simple. Each station should have:
- Clear physical boundaries (cones marking the area)
- Visual instructions (those laminated drill cards)
- Obvious equipment setup (bucket here, tee there)
- A timer or clear endpoint (“Rotate when you hear the whistle”)
This way, you can move between stations, helping where needed. Your helpers feel useful, and the kids get more attention. You also save your voice for important things.
Managing volunteers is about understanding people. They want to help if they know how. They respect clear roles and boundaries. Build the framework and let them do their job. Your team will surprise you with what they can do.
Printable practice templates for each week
Here’s your final product. This section is like the last level of a game. You’ve gathered all the power-ups.
Your Clipboard, Automated: From Planning to Execution
The Dugout Captain virtual clipboard is more than software. It’s a way of thinking that you can print out. These 12-week templates turn every idea into action, step by step.
Each plan follows the “My SAVED Plans” system. You get organized practice stations, skill steps in order, and competition built in. It’s like following Ikea instructions to build better players.
The Gift of Time: Reclaiming Your Evenings
Those Sunday nights spent writing on napkins are over. Just hit print, grab your hat, and go. The stress of planning is gone.
Your practices become smooth and organized. You might even enjoy watching your kid’s game without thinking about the next practice. That’s a big win.
These templates help you avoid coaching burnout. Use them, adjust them, and watch your 10U team do great. Your clipboard is automated, and you have your time back.