Remember when baseball was only played in good weather? It was a sport for sunny days in spring and summer. But now, it’s about training all year, not just when it’s nice outside. It’s not just a choice between practicing inside or outside; it’s about using both to improve.
The indoor facility is like a lab. It’s where skills are honed in a controlled setting. Here, swings and pitching are analyzed to improve performance. It’s where the basics of baseball are learned, away from distractions.
But a player isn’t made in a lab alone. The outdoor field is like a stadium. It’s where skills are tested in real conditions. Here, players face challenges like wind and sun, making their training more realistic.
This isn’t about picking one over the other. It’s about seeing the value in both. The indoor space is for learning the basics, and the outdoor field is for applying those skills. The best programs use both to create well-rounded players.
Facility Goals: Skill Outcomes by Season and Age
Let’s get real. You wouldn’t teach a toddler calculus, and you wouldn’t give a driver’s manual to a 10-year-old. The same goes for youth baseball. Treating a 9-year-old like a 15-year-old is a fast way to burnout and frustration. The goal is to train right, at the right time.
Think of the indoor facility as the laboratory and the outdoor field as the final exam. One is for controlled skill-building; the other for real-world application. The challenge is knowing when to use each environment for each player.
The 8-10 Year Old: The “Lab Rat” Phase
For 8-10 year olds, the indoor facility is key. This is the “lab rat” phase, focusing on building motor programs. We’re talking about agility, balance, and coordination.
The indoor facility is the star for this age. It’s a controlled, weather-proof space for skill-building. The goal is skill acquisition and motor pattern development. Outdoor time is for play and applying these skills in simple games.
The 11-13 Year Old: The Bridge Phase
This is a big transition. The athlete is no longer a lab rat but not yet a varsity player. This is the hybrid zone. The indoor facility is for skill refinement and power development.
The outdoor field becomes the “integration lab.” Here, they learn to apply skills in real game conditions. It’s where they practice their swing and pitching in real situations.
The 14U+ Player: The Crucible
By 14 and up, the script flips. The outdoor field is the main stage. The indoor facility is for targeted work on specific skills.
The real test is outside. Can the hitter track a fly ball in the sun and wind? Can the pitcher field a bunt and make the throw to first on a real dirt infield? The outdoor facility is the final exam for all skills honed indoors.
| Age Group | Primary Focus | Indoor Facility Role | Outdoor Facility Role | Key Development Goal |
|---|---|---|---|---|
| 8-10 (Lab Rats) | Motor Skill Acquisition | Primary Venue: Skill-building in a controlled, safe environment. | Application Playground: Simple games, learning rules, having fun. | Develop fundamental motor patterns and a love for the game. |
| 11-13 (The Bridge) | Skill Refinement & Integration | Skill Refinement Lab: Hitting off a machine, video analysis, pitch recognition drills. | Integration Field: Applying refined skills in game-like scenarios, learning positioning. | Transition from skill acquisition to skill application in a dynamic environment. |
| 14U+ (Game-Ready) | Game-Specific Application | Specialist’s Clinic: Targeted, private work on specific weaknesses. | The Crucible: The primary venue. Real game conditions, situational play, and competition. | Develop game IQ, situational awareness, and performance under pressure. |
Think of it as a video game: the indoor facility is the training level where you master the controls and combos. The outdoor field is the final boss fight with all the weather, pressure, and chaos of a real game. You can’t win the final level if you haven’t mastered the moves in the training room.
So, before you book another cage session or head to the field, ask yourself: What is the specific, age-appropriate outcome for today? Perfecting a swing path, or learning to read a fly ball in the sun? The facility you choose isn’t just a location; it’s a tool for a specific job.
Pros/Cons: The Great Indoor vs. Outdoor Cage Match
Choosing between an indoor cage and an open field is a big decision. It’s not just about the size. It’s a strategic choice that divides coaches and parents. This decision is like a corporate boardroom decision, where the “return on investment” is player development.
The Indoor Facility: The Climate-Controlled Laboratory
The modern indoor facility is like a sterile laboratory. It controls variables and engineers the environment for maximizing reps.
The Pros (The Control Group):
- Year-Round, Weather-Proof Training: Rain, snow, or heat? No problem. You get climate-controlled, predictable sessions, making it the MVP of preseason and offseason work.
- Tech-Enabled Feedback: This is the big-ticket item. You’re not just in a cage; you’re in a data lab. High-speed video, instant swing metrics, and pitch-tracking tech turn every swing into a data point.
- Focused, Safe Repetition: The prodigious number of swings a player can take in a controlled, safe environment is its killer feature. No bad hops, no wind, just the hitter, the machine, and the net.
The Cons (The Bill & The Bubble):
- Cost & Access: Let’s be real. This is the major con. Lane rentals and memberships are a significant, recurring line item. It’s an investment.
- The “Bubble” Effect: The biggest knock? It’s a simulation. The lighting is static. The turf is perfect. The ball flight is predictable. It can create a lab rat hitter who crushes in the cage but struggles under the sun with a 15-mph crosswind.
- Artificial Feedback: The “ping” off a metal bat in a net is a poor substitute for the sound of a line drive on a real field. It can mask a hitter’s true power or a pitcher’s true movement.
The Outdoor Field: The Proving Ground
This is the real world. The sun is in your eyes. The wind is a factor. The grass is a little long. This isn’t a simulation; it’s the game.
The Pros (The Realism Factor):
- Real-Game Replication: This is the #1 pro. You practice in the exact conditions you play in. Sun fielders, wind, bad hops, and sun glare are features, not bugs. It builds game IQ you can’t get indoors.
- Spatial Awareness & Communication: Outfielders learn to communicate on fly balls. Infielders read hops. The sheer space changes defensive positioning and baserunning reads in a way a 70-foot cage never can.
- Cost-Effective (Usually): A public park or school field is often free or low-cost. The sun, wind, and dirt are free (if unpredictable) training partners.
The Cons (Mother Nature is a Fickle Coach):
- Completely Weather-Dependent: This is the Achilles’ heel. A forecast can wipe out a week of practice plans. Your meticulously scheduled session is at the mercy of a pop-up shower.
- Inconsistent Conditions: The “home field” you practice on Tuesday might be a swamp on Thursday. Maintenance is often out of your control.
- Logistical Headaches: No bathrooms, no water fountains, no shelter. Every piece of equipment, from L-screens to buckets of balls, must be hauled in and out.
The Cage Match: A Side-by-Side Breakdown
Let’s put the key factors in the ring together.
| Factor | Indoor Facility (The Lab) | Outdoor Field (The Diamond) |
|---|---|---|
| Weather Dependency | Unaffected. The ultimate control. | Completely Dependent. Your coach is now a meteorologist. |
| Cost of Access | High. You’re paying for climate, tech, and consistency. | Low to None. Sunlight and grass are (mostly) free. |
| Skill Development | Technical Mastery. Repetition, muscle memory, and data-driven swing/pitch mechanics. | Applied Baseball IQ. Reading hops, judging fly balls in the wind, in-game communication. |
| Realism of Conditions | Low. It’s a hyper-focused, controlled simulation. | High. It is the game environment. |
| Primary Risk | Creating a “bubble player” who struggles to adapt to real-game chaos. | Lost development time and inconsistent scheduling due to weather. |
The Final Tally: It’s Not a Cage, It’s a Toolbox
This isn’t about picking a winner. The indoor cage vs. outdoor field debate isn’t a war with one victor. It’s about choosing the right tool for the developmental phase. Use the lab (indoor) for the deep, technical work. Use the proving ground (outdoor) to test, adapt, and apply those skills under real-world pressure. The smartest coaches don’t choose a side—they master the schedule, blending the precision of the cage with the beautiful, messy chaos of the field.
Drill Mapping: What Works Best Where
Choosing the right place for your drills is key to improving. It’s the difference between perfecting a swing in a cage and mastering it in a game. Think of your practice plan as a map for skill growth, moving from simple drills to game-like situations. This is where strategy meets the real world. Our goal is to place drills in the best environment for maximum improvement. Let’s create the map.
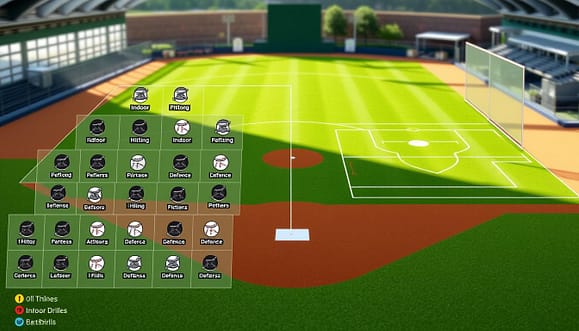
The Drill Selection Matrix: Your Practice Blueprint
Not all reps are equal. A drill selection strategy is your guide for moving players from simple to complex, from the cage to the game. The table below shows key skills and their best training environments.
| Skill Focus | Indoor/Cage Drills (Controlled Environment) | Outdoor/Field Drills (Live Environment) | Primary Objective |
|---|---|---|---|
| Hitting | Tee work, soft-toss, short-toss, hitting off a machine. | Facing live pitching, situational hitting with baserunners. | Build a repeatable, grooved swing; then apply it under pressure. |
| Pitching | Flat-ground bullpens, towel drills, mechanical work. | Live batting practice, fielding practice (PFP), holding runners. | Isolate mechanics, then test them in a dynamic, game-speed setting. |
| Defense | Footwork ladders, glove-work drills, framing (catchers). | Fungos, cut-off/relay communication, live grounders with base runners. | Build muscle memory in isolation, then test it with chaos. |
Hitting: From the Cage to the Batter’s Box
Indoor cages are your batting lab. This is where you deconstruct.
- Indoor (The Lab): This is where you build the swing. The drill selection here focuses on isolation and repetition. Think high-volume tee work or soft-toss drills to groove a specific swing path. The goal is to create muscle memory without live pitch movement.
- Outdoor (The Proving Ground): This is where the swing is applied. The drill selection shifts to integration. Live batting practice and situational hitting with a runner on second force decision-making. The live pitcher and real field defenders add complexity.
Pitching: Tunnel Vision vs. The Batter’s Eye
Pitchers need a dual-environment approach.
- Indoor (The Lab, Part 2): The tunnel or cage is for the science of pitching. This is where towel drills and flat-ground bullpens work on mechanics. It’s about creating a repeatable, efficient delivery.
- Outdoor (The Arena): The science must be battle-tested. Outdoor drill selection for pitchers is about chaos management. Live BP and fielding your position (PFP) are key. The pitcher must execute polished mechanics while facing a runner and a hitter.
Defense: Repetition vs. Reaction
Fielding a ground ball is a skill. Fielding a ground ball with a runner barreling down the line and a bad hop is a baseball play. The drill selection must bridge that gap.
- Indoor (The Clinic): This is for footwork. Short-hop drills and rapid-fire grounders from a coach’s fungo focus on creating a foundation of clean, efficient movement.
- Outdoor (The Crucible): This is where the clinic meets the chaos. Fungo a ball into the gap and force outfielders to communicate who will make the play. Run a 5-4-3 double play with a runner sliding hard into second. The drill selection shifts from “can you field it” to “can you field it, process the situation, and make the correct team-based play?”
The smart coach doesn’t just have a list of drills; they have a drill selection map. It’s a simple, powerful filter: if the goal is to isolate and perfect a single mechanic, the controlled, distraction-free cage is your lab. But if the goal is to teach a skill to function in the beautiful, chaotic mess of a real game, you must take it outside. Your practice plan isn’t a checklist of activities; it’s a strategic map, moving players from the predictable lab to the unpredictable diamond, one intentional drill at a time.
Weather & Safety Policies: Your Contingency Playbook
When the first raindrop falls or the heat index climbs, a coach’s real test begins. This isn’t about rainouts; it’s about having a weather plan that treats the forecast as a tactical variable, not an obstacle. A great weather plan doesn’t just react; it adapts, ensuring every drop of practice time is optimized, rain or shine.
Think of weather not as an opponent, but as a training partner. Humidity changes a ball’s grip and flight. A pop-up in a glaring sun is a different beast than one under lights. Your weather plans should account for performance, not just safety. It starts with the most critical element: heat.
Heat: The Silent Opponent
Heat illness isn’t just a summer problem. It’s a performance killer and a serious health risk. Your policy should be as non-negotiable as a 3-2 count with the bases loaded.
- Heat Index Policy: Establish a clear, science-based cutoff. Many leagues follow a “feels like” temperature of 105°F (40.5°C) as a “red flag” condition, mandating increased rest and water breaks. The Wet Bulb Globe Temperature (WBGT) is the gold standard for measurement.
- Hydration Strategy: Water isn’t a suggestion; it’s mandatory. Mandatory water breaks every 20-30 minutes, with players bringing their own labeled bottles and coaches actively monitoring for signs of heat stress.
- Uniform & Gear: Light-colored, moisture-wicking fabrics are non-negotiable. Dark jerseys on a 95°F day aren’t tough; they’re dangerous.
Lightning & Storms: The 30-30 Rule
When you see lightning, the game is already over. The “Flash-to-Bang” method is your best friend. Count the seconds between flash and thunder, then divide by 5. That’s the distance in miles. If it’s 30 seconds or less (lightning within 6 miles), seek shelter immediately. The all-clear should only be given 30 minutes after the last observed lightning or thunder.
The “All-Weather” Facility: Your Bunker
This is where the indoor facility transitions from luxury to necessity. It’s not just a rainout shelter; it’s a climate-controlled, all-weather performance lab. When the field is a swamp or the heat index is 110°F, the indoor cage or gym becomes the training ground. This is where you can work on the micro-skills that weather would steal from you.
The tactical advantage is immense. While opponents are rescheduling, your players are in the cage, getting 100 dry swings with a pitching machine dialed to the exact speed they need. It turns a weather delay into a development opportunity.
| Weather Condition | Outdoor Protocol | Indoor Facility Pivot |
|---|---|---|
| Extreme Heat (Heat Index > 100°F) | Cancel or severely limit intense activity. Mandatory 5-min water breaks every 20 mins. | Move to indoor cage. Focus on low-intensity skill work, video analysis, or classroom sessions on strategy. |
| Thunder/Lightning | Immediate evacuation to a sturdy, enclosed building. No exceptions. | Facility is the designated shelter. Continue light training (e.g., soft toss, grip drills) away from windows. |
| Heavy Rain/Wet Grounds | Cancel. Wet turf = injury risk and field damage. | Perfect for tee work, soft toss, and pitching mechanics in the cage. Fielding grounders on turf. |
| High Winds | Cancel fly-ball drills. Batting practice becomes unpredictable. | Ideal for controlled hitting drills, focusing on mechanics without environmental variables. |
The most critical element of your weather plans is communication. Have a clear, multi-channel alert system (text, app, email) to notify parents and players of changes. Your plan should be written, shared with parents at season start, and posted visibly. A good weather plan turns panic into a pivot, ensuring that a rained-out practice is just a different kind of productive.
Ultimately, a weather plan is a statement of philosophy. It says player safety and continuous development are non-negotiable, regardless of what the sky decides to throw at you.
Budget & Scheduling: The Logistics of Lane Rentals and Shared Space
Choosing between indoor and outdoor training isn’t just about money. It’s about making the most of your resources. Your budget is for something very valuable: guaranteed, quality reps for young athletes. Let’s look at the financial side of things.
The debate is not just about indoor versus outdoor. It’s about what you’re really getting. Predictable, weatherproof access versus flexible, lower-cost space. The real cost comparison is deeper than that.
Indoor facilities offer guaranteed access for a premium. It’s like an insurance policy against the weather. Outdoor facilities are cheaper but weather can be unpredictable. This can lead to canceled practices and the need for expensive indoor space.
For a 12U travel team, a 70/30 split works well. Spend 70% of practice time in an affordable outdoor space for skill development. Use 30% in a rented indoor facility for intense, climate-controlled reps. This mix balances costs effectively. The Wenger GearBoss Athletic Planning Guide helps plan this schedule.
Here’s a quick breakdown of the core financial logistics:
| Factor | Indoor Facility | Outdoor Field/Cage |
|---|---|---|
| Cost Per Hour | Higher hourly rate | Lower permit/rental fee |
| Weather Dependency | None (Controlled Climate) | High (Rain, Cold, Heat) |
| Scheduling Flexibility | Fixed, pre-paid blocks | More flexible, but weather-dependent |
| Shared Space Efficiency | High (dedicated lane) | Variable (shared public space) |
Scheduling is key. Lane rentals and field permits are often sold in blocks. For indoor facilities, sharing a block with another team can split costs. For outdoor spaces, building relationships with local parks and schools helps understand their schedules. Using shared space wisely can save money.
Your budget is a strategic tool. It’s not just about finding the cheapest option. It’s about getting the right type of time. Spend on guaranteed, high-quality indoor reps during the preseason. Use outdoor sessions for cost-effective, if less predictable, practice. The best schedule is one that offers consistent, high-quality reps, rain or shine.
Sample 8-Week Blended Plan: A Preseason Case Study
Every great baseball transformation starts with a plan. For 14-year-old Jamie, this plan was an 8-week journey. It moved him from the batting cage to the sun-drenched field. This journey was not just a training schedule but a story of growth.
We followed Jamie’s preseason, mixing indoor and outdoor training. This showed how a blended approach works in youth baseball. It’s not just a theory but a proven method for development.

The Lab Phase: Deconstructing the Swing (Weeks 1-4)
Jamie’s first four weeks focused on the basics. We worked indoors, away from the field. This indoor mechanical work broke down the swing into its parts.
We used high-speed video to analyze Jamie’s swing. It was about hitting the ball right, not just far. A pitch machine provided consistent pitches, removing the uncertainty of live games. Our goal was a swing that was efficient and sound.
This preseason training focused on quality over quantity. Jamie took 100 swings, each one analyzed and improved. We used technology to track his progress. By week four, Jamie’s swing was stronger and smarter.
The Proving Ground: From Lab to Field (Weeks 5-8)
Weeks five to eight were about putting Jamie’s skills to the test. We moved him outside. This phase introduced live pitching scenarios and game situations.
We simulated real game situations. Jamie faced live pitchers, defensive shifts, and base-running challenges. The 8-week blended plan bridged the gap between perfect swings and real games. By week seven, Jamie was reading pitchers and adjusting his swing in real-time.
| Week | Primary Focus | Primary Environment | Key Drills & Objectives |
|---|---|---|---|
| 1-2 | Mechanical Foundation | Indoor Cage | Isolated swing mechanics, tee work, video analysis |
| 3-4 | Pitch Recognition | Indoor Cage | Pitch machine work, reaction time drills, breaking ball recognition |
| 5-6 | Controlled Transfer | Indoor/Outdoor | Live pitching (reduced velocity), situational hitting, bunting |
| 7-8 | Game Simulation | Outdoor Field | Live scrimmages, situational hitting, base-running |
Jamie’s 8-week journey shows the power of modern youth baseball training. The 8-week blended plan makes players smarter and more adaptable. By the end, Jamie was not just hitting balls; he was thinking his way through at-bats.
Equipment Deep Dive: Turf Shoes, Screen Types, and the Right Ball for the Job
So, you’ve got your cage time and field booked. The players are ready. But are you? Choosing the right gear for an indoor cage versus an open field is key. It’s about physics, material science, and a bit of magic.
Think of your equipment as the link between your athlete and the environment. The wrong choice is like a race car driver with snow tires at the Monaco Grand Prix. It’s not just about having the gear; it’s about having the right gear for the specific surface and lighting of each place.
Footwear: From Metal Spikes to Multi-Stud Turf Shoes
Physics meets the floor here. On a real dirt and grass field, metal or molded cleats are kings. They dig in for explosive starts and sharp cuts. But, on a turf or rubberized cage surface, they’re like golf spikes on a basketball court—slippery and unstable.
For the synthetic turf or hard-packed dirt of an indoor cage, you need turf shoes. They have dozens of small, rubberized nubs or a multi-studded, flat-bottomed outsole. This design provides hundreds of micro-pivot points, distributing force evenly. It’s the difference between a racing slick and an all-weather tire. The right turf shoe gives the grip to drive through a swing or a pitch without causing a dangerous injury.
L-Screens vs. Full Cages: A Barrier to Entry
This gear stands between your pitcher and a 90+ mph line drive. The choice here is a direct trade-off between protection and realism.
- L-Screens: The workhorse of the cage. It’s a single, portable screen that gives the coach or machine a protected “window” to throw from. The big pro? It doesn’t block the hitter’s view. A pitcher or coach can work on location and movement, and the hitter gets a full, realistic look at the release point. The con? A truly scorched line drive to the gap between the screen and the cage netting can find its mark. It requires a skilled operator who trusts their own reaction time.
- Full Cages (Tunnels): This is the “panic room” of protective gear. The pitcher or coach is entirely enclosed in a steel cage. The pro is absolute, 100% safety from any comebacker. The con is the “cage effect”: the hitter is now hitting against a stationary, flat, chain-link wall. It’s a psychological and visual barrier that can mess with a hitter’s perception and a pitcher’s follow-through. It’s safer, but less game-realistic.
The Ball: It’s Not Just a Ball
Not all baseballs are created equal, and the lighting in an indoor cage changes the game. Under the harsh, often yellow-tinged artificial lights of a typical facility, a standard white ball can “jump” or “ghost” in a player’s vision.
Many indoor facilities now use optic yellow or optic orange balls for machine or live pitching. The high-vis color “pops” against the dark netting and dimmer background of an indoor cage, making it easier for hitters to track spin and for coaches to see spin and movement more clearly. For live pitching, a two-tone (red/white) ball is also popular, as the red/white contrast creates a clear visual cue for spin direction.
| Ball Type | Best For | Indoor Cage Use | Outdoor Field Use |
|---|---|---|---|
| Leather Game Ball | Live Pitching, Scrimmages | Acceptable, but can be hard to see. | Ideal. The standard for gameplay. |
| Machine-Grade (Hard) | Pitching Machines | Excellent. Durable and consistent for reps. | Rarely used; too heavy for most arms. |
| Safety/Reduced Injury Factor (RIF) Balls | Younger Players, Indoor Safety | Ideal for multi-use spaces, less injury risk. | Good for early fielding drills with new players. |
| Optic Yellow/Orange | Low-Light or Cage Hitting | Excellent. Enhances visibility under artificial light. | Good for overcast days, less critical. |
Netting: Your Last Line of Defense
The netting is the unsung hero and a major differentiator between a cage and a field. It’s not just about stopping balls; it’s about longevity and safety. Look for these specs:
- Knotless vs. Knotted: Knotless netting (where the twine is woven, not tied) is the gold standard. It’s smoother, causing less erratic bounces and drastically reducing “spin back” where the ball rockets back at an odd angle. Knotted netting is cheaper but acts like a trampoline grid, creating unpredictable rebounds.
- Twine Weight:
Indoor facilities need a heavy-duty, UV-stabilized net (even indoors, light degrades nylon). A good rule of thumb: if you can see daylight through the net when you’re close, it’s not rated for the high-velocity impact of a line drive. The right netting contains the chaos, turning a wild ricochet into a harmless drop.
Choosing between indoor cages vs fields isn’t just about location; it’s about optimizing the tools for the environment. The right shoe, the right screen, the right ball, and the right netting aren’t just details—they’re the variables that separate a good practice from a great, and safe, training session.
Metrics That Matter: Tracking Progress Across Environments
In today’s baseball world, “what gets measured gets managed” is true. But not all data is the same. Indoor and outdoor environments require different metrics.
The real skill is linking lab results to game performance. This connection is key.
Think of indoor training as a lab and outdoor fields as the real test. You test products in labs but the real test is the market. Coaches and parents track both to understand athlete growth.
The Lab Results: Metrics Forged in the Indoor Facility
Indoor training offers controlled, repeatable data. It’s where we measure swing or pitch components alone.
Exit Velocity & Launch Angle
HitTrax gives us “launch data.” We look for how hard and how a ball is hit. A 95 mph exit velocity is impressive. But it’s just a number until it translates to game success.
A player hitting 95+ mph in the cage is building a foundation. But can they hit a live, moving ball? That’s the outdoor test.
Spin Rate & Spin Axis (for Pitchers)
TrackMan and Rapsodo track pitch data. We measure spin rate and efficiency. High spin rates and sharp breaks in the lab are promising. But the real test is under game pressure.
Bat Speed & Attack Angle
High-speed cameras and bats show swing details. We check if a hitter is on plane and delivering the barrel well. This is about mechanics. But it’s not the same as hitting a 90 mph fastball in a game.
The Field Test: Metrics Forged in the Sun
Outdoor games test lab results. Data shifts from theoretical to practical.
First-Step Quickness & Route Efficiency
No machine can replace a 90-foot sprint. First-step quickness is key for outfielders and infielders. We measure jump and route efficiency with video. A player taking a perfect route saves bases.
Reaction to the “Bad Hop”
This is the ultimate fielding test. We can’t replicate the bad hop in practice. We track successful plays on tough hops.
Pop Time for Catchers
Pop time is a classic test. A catcher might have a sub-2.0 pop time in a showcase. But can they do it in a real game? The game’s pressure is the ultimate test.
Connecting the Dots: From Lab to Game
The magic of coaching is linking indoor metrics to outdoor results. A 5 mph exit velocity increase might mean a 50-point OPS jump. A 200 RPM fastball spin increase might not lead to more strikeouts but to more weak contact.
We use video analysis to connect the dots. A 95 mph exit velo in the cage means hitting an outside fastball in a game. A 2500 RPM curveball spin means swing-and-miss or weak contact in a game. Lab data explains what we see on the field.
The most important metric is player confidence. Indoor metrics build the foundation, outdoor results build the player. The coach’s job is to bridge the two.
Coach & Parent Communication Templates: Aligning Expectations
Forget the group text chaos. The most powerful tool in your coaching arsenal isn’t a new drill or a fancy radar gun—it’s a well-crafted email. Clear, consistent, and strategic communication is the glue that binds a successful youth baseball program. It turns sideline spectators into informed, aligned partners in the development process.
This isn’t about spamming inboxes with practice times. It’s about crafting a narrative for your season. Every drill and facility change is framed within the larger plan. We’re not just managing schedules; we’re managing expectations.
The “Why” Behind the Template: Coaching the Grown-Ups
Every parent wants to help, but “How was practice?” is a dead-end question. Your communication is the cheat sheet. When a parent knows the why behind the what, they shift from passive observer to active supporter.
They can ask better questions than “Did you have fun?” and reinforce your coaching points at home. This is about turning parents from bystanders into informed allies. They understand that Tuesday’s cage session on two-strike hitting directly connects to Thursday’s live batting practice.
Template 1: The Weekly Focus Announcement
This email goes out before the practice week begins. It frames the “why.”
Subject: This Week in the Cage: Two-Strike Approach & Defensive Shifts
Body Template:
- This Week’s Focus: Two-strike hitting and defensive positioning with a runner on 2nd.
- Why This Matters: In Tuesday’s indoor session, we’ll use the batting cage to drill the “choke and poke” choke-up grip and practice fouling off tough pitches. This directly leads to Thursday’s outdoor session, where we’ll apply it against live pitching.
- What to Watch For: This week, ask your player about their “two-strike mindset.” The goal isn’t a home run; it’s to put the ball in play and move the runner.
- Parent Cue: Instead of “Did you get a hit?”, try “What was your plan with two strikes today?”
Template 2: The Drill Purpose & Parent Cue Sheet
This is your “cheat sheet” for sideline conversations. Distribute it as a one-pager.
| Drill Name | What It Looks Like | What We’re Really Practicing | Parent Cue for Home |
|---|---|---|---|
| Fungo Grounders | Coach hits sharp grounders, players field and make a throw. | Footwork and glove presentation, not just stopping the ball. | “How did you set your feet before the ball arrived?” |
| Two-Strike Toss Drill | Hitter with choke-up grip, coach tosses, hitter focuses on contact. | Plate coverage and bat control under pressure. | “How did you adjust your stance with two strikes?” |
Template 3: The Quick-Change Alert
For weather or facility changes. Speed and clarity are key.
Subject: ALERT: Practice Moved Indoors (Thurs, 5:30 PM)
Body: “Due to the field conditions, today’s 5:30 PM session has moved to the Indoor Training Center (123 Baseball Lane). We’ll focus on the same two-strike approach, but now in the batting cages. Please have players bring turf shoes or sneakers. The focus remains on two-strike approach and choke-up mechanics.”
This template works because it states the change, the new location, the logistics (footwear), and, importantly, reiterates the session’s core focus. The “why” remains consistent, even when the “where” changes.
These templates do more than inform; they educate and align. They transform parents from asking “What did you do?” to understanding “Why does that matter?” That’s how you build a program, not just a team.
The Ultimate Pre-Flight Checklist: From Booking to Safety Check
Think of this as your pilot’s pre-flight for a perfect practice. It’s not just a to-do list. It’s a strategic checklist to reduce risk and make the most of your training time. A smooth session is all about planning.
For the Indoor Cage: Your mission starts before you arrive. First, confirm your lane time and booking. Make sure you have the right gear: turf shoes, a proper L-screen, and the right balls for the machine. Also, check the facility’s screen and netting policy. This is your gear-up and system check.
For the Outdoor Field: Your checklist moves outside. First, check the weather and field conditions. Look at the facility’s lightning and heat policies. Have a hydration plan that goes beyond a single water bottle. Before you start, check the field for mud, hardpan, and divots.
This list isn’t about creating busywork. It’s about turning logistical planning into a strategic advantage. It turns “just showing up” into a deliberate, productive, and safe training session. You’ve mapped the season, blended the environments, and communicated the plan. This final checklist is your launch sequence. Now, go play ball.