Think treating your throwing mechanics like they’re disposable makes sense? That’s about as brilliant as using a Ferrari for demolition derby.
Experts like Greg Vogt and Texas Baseball Ranch show a harsh truth. Injury rates are soaring, and burnout is off the charts.
Your arm care routine is more than just a task. It’s your shield against becoming a statistic. It’s about keeping your career alive, not letting it crash like a tech startup in a downturn.
Poor off-season prep, sudden workload increases, and bad recovery plans are a deadly mix. Think of good maintenance as your own Secret Service.
It might seem too much until someone’s throwing hard at you. In sports, that’s what high-velocity throws and packed schedules are like. They’re tough, even for Navy SEALs.
Warm-up framework: tissue prep, activation, movement prep
Most pre-game warm-ups are like waiting for food to arrive while stretching a bit. It’s not real preparation. The Texas Baseball Ranch’s A.M.A.S.S. method gives us a clear plan for what’s important.
Think of it as setting up your body’s system before throwing. Without this, you’re using old technology that’s bound to crash.
Tissue Prep
This isn’t just rolling on foam like dough. It’s about targeted myofascial release, starting with an assessment. This way, we focus on your tight spots, not just anyone’s.
Using 8ctane’s methods, we find specific areas to work on. Our goal is to make your tissues ready, not just loose.
Activation
Now, we wake up your neuromuscular system. We use hurdles, ladders, and drills to get your system going like a triple espresso.
Activation is the bridge between stretching and moving. It’s like booting up your system before running the software.
Movement Prep
This is where we put theory into practice. We make sure your scapular control and shoulder stability work, not just in theory.
We start with simple patterns and move to throwing-specific movements. It’s like shifting gears in a car.
The Driveline Youth Arm Care Program shows great models for this phase. It’s the difference between showing up and being ready to play.
| Phase | Primary Focus | Duration | Key Exercises | Mental Cue |
|---|---|---|---|---|
| Tissue Prep | Myofascial Release | 5-7 minutes | Lacrosse ball work, foam rolling | “Find the spots, not just roll” |
| Activation | Neuromuscular Wake-up | 8-10 minutes | Mini-band walks, hurdle drills | “Fire the system, don’t just move” |
| Movement Prep | Dynamic Integration | 7-9 minutes | Med ball throws, walking lunges | “Connect movement to throwing” |
This framework is essential for shoulder stability and arm health. The table shows how each phase builds on the next, creating a complete preparation system.
Remember, proper scapular control starts long before throwing. It begins with this systematic approach to preparing your body.
Throwing-specific activation options
Most J-band exercises look like octopuses dancing. Youth players need real preparation, not just flailing. It’s about getting your body ready for throwing, not just looking good.
Texas Baseball Ranch and 8ctane show us the truth. Good activation looks like real throwing. It means scapular retraction, external rotation, and shoulder flexion that actually helps.
Exercises should match throwing mechanics, not just be fitness moves. Use diagonal patterns and intensities that match your throwing. This is what separates pros from amateurs.
For youth, J-band exercises should focus on three key areas:
- Scapular retraction with external rotation (mimicking late cocking phase)
- Diagonal flexion patterns (simulating arm acceleration)
- Controlled deceleration movements (preparing for follow-through)
Intensity is more important than how many reps you do. These exercises are like system updates for your throwing. They prepare your body for the real thing.
| Exercise Type | Youth Rep Range | Key Focus Area | Common Mistakes |
|---|---|---|---|
| Scapular Retraction | 8-10 reps/side | Mid-back engagement | Shrugging shoulders |
| External Rotation | 10-12 reps/side | Rotator cuff activation | Using momentum |
| Diagonal Patterns | 6-8 reps/side | Arm path mimicry | Over-rotating torso |
| Deceleration Control | 5-7 reps/side | Eccentric control | Letting band snap back |
Quality is more important than quantity. Each rep should look like a mini version of your throw. If it doesn’t, you’re just exercising, not activating.
The best youth players see activation as programming their movements. They don’t just go through the motions. They create neuromuscular pathways. That’s the difference between being prepared and performing well.
Post-throw recovery: breathing, mobility, light strength
While everyone’s watching the radar gun readings, the real magic happens after the last pitch. Your post-throw recovery protocols determine whether you’ll be throwing gas in August or icing your shoulder in the training room. This isn’t about passive rest – it’s about active restoration that tells your body “we’re building something here.”
Breathing: Your Nervous System’s Reset Button
Forget what you learned in biology class – breathing after throwing isn’t just about oxygen exchange. It’s your central nervous system’s control-alt-delete command. When you’re competing, your body operates in fight-or-flight mode. The Texas Baseball Ranch’s research shows proper breathing patterns can drop your heart rate by 15-20 beats per minute within 90 seconds.
Try this simple drill: 4-7-8 breathing. Inhale for 4 counts, hold for 7, exhale for 8. Repeat five times. It’s like giving your nervous system a spa day after it just ran a marathon.
Mobility: Restoring What Throwing Stole
Mobility work post-throw isn’t about forcing new ranges of motion. It’s about reclaiming what the repetitive throwing pattern borrowed and forgot to return. Greg Vogt’s recovery strategies emphasize targeted work on three key areas:
- Thoracic spine rotation (because throwing is basically controlled spinal torsion)
- Hip capsule mobility (your lower half dictates your upper half’s longevity)
- Shoulder capsule restoration (where careers are literally hanging in the balance)
These aren’t aggressive stretches. They’re gentle reminders to your joints that they need to play nice together for the long haul.
Light Strength: Reinforcing Without Overloading
Light strength work post-throw is the equivalent of showing up to work the day after a big project – you’re maintaining operations without starting new initiatives. Think low-weight, high-rep exercises that reinforce patterns without adding fatigue:
| Exercise Type | Rep Range | Purpose | Frequency |
|---|---|---|---|
| Rotator Cuff Work | 15-20 reps | Blood flow restoration | Post every throwing session |
| Scapular Stabilization | 12-15 reps | Muscle memory reinforcement | 3-4 times weekly |
| Core Activation | 20-25 reps | Kinetic chain integration | Post every throwing session |
| Low-Back Isometrics | 30-second holds | Spinal protection | 2-3 times weekly |
These recovery protocols separate the players who maintain velocity through September from those shopping for retirement condos at 22. It’s not glamorous work, but neither is explaining to your grandkids why you peaked in high school.
Soreness rules and red flags
Trying to understand a young pitcher’s pain report is like trying to read ancient hieroglyphics. Their accuracy is not as reliable as weather forecasts. We need better soreness guidelines than just “my arm feels funny.”
Normal soreness is like a pleasant ache that shows your muscles are getting stronger. Red flag pain, on the other hand, is sharp and specific. It’s like the difference between a market fluctuation and a financial crash.
Here’s a simple rule: muscle soreness that gets better with movement is usually okay. But joint pain that gets worse with throwing means stop right away. Soreness that goes away after warming up is good to go. But pain that stays even after activity is a big warning sign.
Objective measures are key, not just what the pitcher says. Greg Vogt’s injury analysis and Texas Baseball Ranch’s pain audit concepts are important. They teach us to watch for:
- Velocity drops greater than 5%
- Changes in movement patterns
- Decreased range of motion
- Altered arm action during throwing
These are the real red flags we need to spot. It’s about knowing the difference between normal soreness and a serious problem.
For more on this important topic, check out this great resource on differentiating soreness, fatigue, and pain in baseball.
| Type of Sensation | Location | Response | Return Timeline |
|---|---|---|---|
| Normal Muscle Soreness | General muscle groups | Continue with modified activity | 24-48 hours |
| Joint Pain | Specific joint area | Immediate cessation | Medical evaluation required |
| Sharp/Pinpoint Pain | Localized spot | Stop all throwing | Doctor consultation needed |
| Fatigue Without Pain | Whole arm | Reduce volume 50% | Next session |
Good soreness guidelines aren’t about avoiding all discomfort. They’re about knowing which discomfort is helpful and which is not. The body speaks in patterns, not single points. Learn its language before it starts screaming.
Age-based workload and pitch count tables
Let’s talk about the numbers that separate responsible coaching from reckless ambition. These aren’t suggestions – they’re the guardrails preventing young arms from careening off cliffs.
Greg Vogt’s research gives us data-driven boundaries that should be non-negotiable. For ages 9-12: start at 30-40 pitches early season, gradually building to 60, with an absolute hard cap at 80. Why? Because 12U trophies aren’t worth Tommy John surgery.
Ages 12-14 should begin at 30-50 pitches, ideally staying under 80 all season. High school players can build more aggressively but need intelligent progression – adding only one more “up” or 15-20 pitches beyond their longest live session.
The brutal truth? Most youth tournaments ignore these guidelines completely, making travel baseball more dangerous than necessary. These numbers aren’t arbitrary; injury data shows workload spikes cause more damage than chronic overuse.
It’s not about limiting your child’s future – it’s about protecting it. Smart pitch counts protect young arms while allowing development.
| Age Group | Early Season Max | Season Build | Hard Cap |
|---|---|---|---|
| 9-12 years | 30-40 pitches | 60 pitches | 80 pitches |
| 12-14 years | 30-50 pitches | 70 pitches | 80 pitches |
| High School | Based on previous max | +15-20 pitches | Varies by experience |
These guidelines represent the minimum standard for arm safety. They’re based on physiological development stages, not arbitrary numbers. The younger the athlete, the more conservative we must be with pitch counts.
Remember: overuse injuries don’t announce themselves with fanfare. They creep in silently, often showing up years later when that promising young arm suddenly can’t find the strike zone.
Proper pitch counts aren’t restrictions – they’re the framework that allows sustainable development. They’re what separates coaches who understand baseball from those who just understand winning.
Weekly schedules for pitchers vs position players
Ever tried comparing a marathon runner’s training plan to a sprinter’s? That’s what we do when we look at weekly schedules for pitchers and position players. They have different needs and ways of recovering.
Pitchers need to throw consistently, 5-6 days a week. But they need to do it smartly. Greg Vogt suggests keeping intensity levels in check. This means not pushing too hard, even when it feels easy.
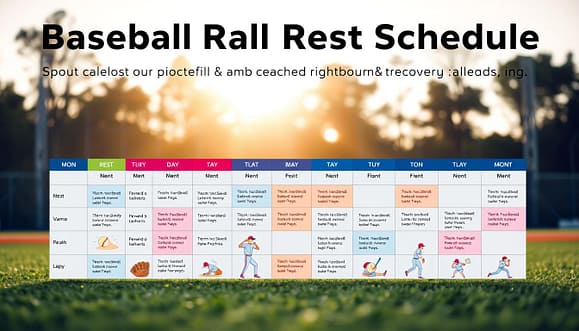
Position players, on the other hand, focus on skill work and less throwing. They’re like sprinters, needing quick bursts of energy. The Texas Baseball Ranch’s approach is great here, blending different types of training.
Many programs go wrong by not balancing throwing and playing other positions. This can lead to injuries. It’s like training for a marathon by only running once a week but going the full distance every time.
The key is integration. Your schedule is more than a calendar; it’s a plan for success. Pitchers need steady, controlled throwing. Position players need to work on their skills with careful intensity.
Now, let’s talk about rest days. In baseball, rest days mean active recovery, not just sitting around. This approach helps each role recover better.
For pitchers, active recovery might include:
- Light catch play at 60-70% intensity
- Mobility work focused on shoulder and hip complexes
- Breathing and recovery drills (not Netflix and napping)
Position players need different things:
- Skill work without high-intensity throwing
- Movement prep specific to their defensive positions
- Recovery that addresses explosive movement patterns
Recovery is not just about resting. It’s about doing work to recover. Those rest days are actually training days for different systems.
Think of your schedule as a choice between a long-lasting arm and a broken one. It’s not about working harder. It’s about working smarter. The difference between pitchers and position players is not about favoritism. It’s about their different needs.
When you look at your weekly plan, ask if it’s for a marathon or a sprint. Getting this wrong can end careers early. Proper rest days and smart scheduling are essential for survival in baseball.
Return-to-throw progressions after rest or injury clearance
Coming back from an arm injury is not easy. It’s like rebuilding Rome after it’s been destroyed. You need to rebuild carefully, not just start over.
The Texas Baseball Ranch has a smart approach. Before throwing again, you must ask yourself: Who are you now? Your injury has changed you, and your body has too.
We start with a “pain audit” to see where you are now. We check your movements and performance to set new goals. It’s not about what you were before the injury.
The return to throw program uses Greg Vogt’s strategies. It’s like building bridges to get you back to where you want to be. It’s not just a list to follow.
This program is flexible and changes based on how you feel. We increase throwing intensity slowly. We focus on building your capacity, not just doing things.
The key is not how far or fast you throw. It’s how well you recover between throws. If you’re not recovering, we slow down. It’s better to be safe than to try to impress everyone too soon.
Our goal is sustainable growth, not just quick fixes. Some days you’ll make progress, others you won’t. We focus on building a strong arm for the season, not just meeting deadlines.
Think of your return to throw program like rebuilding your finances after bankruptcy. Slow and steady wins. Your future self will appreciate the patience.
Minimal-equipment arm care circuit
Who needs a fancy gym when your kitchen has everything for elite arm care? The minimal-equipment arm care circuit makes top-notch fitness accessible to all. It shows that your throwing health shouldn’t rely on your wallet.
Think about it: that resistance band in your closet is cheaper than your last coffee. Your water bottles can be used as weights. And towel drills? They’re more valuable than many pricey gadgets.
This isn’t a watered-down version. Texas Baseball Ranch and 8ctane show that simple methods can outdo complex ones. Focus on the basics, not fancy gear.
Our circuit focuses on three key areas:
- Scapular control with band pull-aparts
- Rotator cuff endurance through external rotation drills
- Shoulder stability using overhead carries with household items
This system is as portable as a diplomat’s passport. You can train anywhere – hotels, backyards, basements. Consistency beats fancy equipment any day.
Here are the exercises that turn everyday items into tools for athletic improvement:
| Exercise | Equipment Needed | Primary Benefit | Sets/Reps |
|---|---|---|---|
| Band Pull-Aparts | Resistance band | Scapular retraction | 3×15 |
| External Rotations | Water bottle/resistance band | Rotator cuff endurance | 3×12 each arm |
| Overhead Carries | Gallon jug/backpack | Shoulder stability | 3×30 second holds |
| Towel Drills | Bath towel | Deceleration training | 3×8 each arm |
The program’s beauty is in its simplicity. No need for complicated apps or weird gadgets. Just effective movements that strengthen your arms.
Remember, the best gear is useless if you’re not using it. This minimal-equipment arm care circuit cuts through excuses and delivers top results on a budget.
Integrate with strength days to avoid overload
Think of your training schedule like a delicate ecosystem where everything’s connected. You wouldn’t schedule a marathon on leg day, right? The same logic applies to throwing and strength training.
Texas Baseball Ranch’s Stress/Strengthen concept reveals a simple truth: your arm doesn’t operate in isolation. Full-body fatigue impacts throwing mechanics more than any single shoulder exercise. It’s like trying to conduct an orchestra where half the musicians are exhausted.

Greg Vogt’s workload management research shows the golden rule: never max out throwing intensity on max strength days. That’s how you create the perfect storm of neuromuscular fatigue. It’s the training equivalent of driving with both feet on the accelerator and brake simultaneously.
Smart integration means periodizing throwing intensity inversely to lifting intensity. High-intent throwing belongs on lower-body dominant or recovery days. Lighter throwing pairs with upper-body max effort sessions.
This approach isn’t just about avoiding injury—it’s about maximizing performance. Proper integration ensures each training component enhances the others. Think of it as portfolio diversification for athletic performance.
Remember: overload isn’t about any single session. It’s the cumulative effect of poorly coordinated training stresses. Your body keeps score even when you don’t.
The goal? Create synergy between throwing and strength work. When done right, they amplify each other like a well-choreographed dance.
Parent and athlete education one-pagers
Sports manuals can be as hard to read as tax codes. But Greg Vogt’s tips on talking to parents are a game-changer. The Texas Baseball Ranch knows that during tournaments, no one reads books. They grab snacks instead.
These one-page guides make complex medical info easy to understand. They’re like cheat codes for parents. Who has time to learn about orthopedics when there’s so much else to do?
The elbow health section is a goldmine of preventive care. It answers the questions parents secretly Google at night. Like, “Is this normal soreness?” and “When should we panic?”
These guides have simple tests you can do at home. No doctor needed. They show if your joints are stressed and when to see a pro. It’s like having a sports doctor on your fridge.
| Normal Response | Concerning Signs | Immediate Action Required |
|---|---|---|
| Mild muscle soreness resolving within 24 hours | Sharp elbow pain during throwing motion | Stop throwing immediately |
| Stiffness that improves with light movement | Pain that persists through next day | Consult sports medicine professional |
| Fatigue after high-intensity sessions | Swelling or warmth around joint | Implement ice and compression |
| Gradual performance improvement | Decreased throwing velocity or accuracy | Communicate with coaching staff |
The beauty of these guides is what they don’t have. No confusing terms, no conflicting studies. Just clear advice to avoid big problems.
These one-pagers protect your family. They help avoid playing through pain and ignoring serious injuries. In youth sports, the biggest enemy is not the opposing team. It’s not knowing the truth.
Monitor adherence and outcomes
Plans don’t work if you don’t track them. Watching how well plans are followed makes them real. It’s about seeing patterns, not just watching.
We focus on how well things are done, not just if they’re done. It’s not just about speed. How well you move and how fast you recover are key. How you move when tired tells a lot.
Numbers show us what we might feel but not see. A small drop in speed could warn of injuries before they start. A drop in external rotation can signal trouble ahead. Ideas from 8ctane and Texas Baseball Ranch show this.
Tracking progress helps us change and improve. It’s the difference between hoping your arm care works and knowing it does.
The real proof is in the results, not just the plans. Results don’t lie, even when we do.