Choosing the right gear for youth baseball or softball is more than just buying equipment. It’s a decision based on data and high stakes. If you make the wrong choice, you’re not just wasting money. You’re risking a young athlete’s safety and growth.
Think about the L-screen. A weak one is like a cardboard shield against a cannon. It’s like a Sixth Sense twist: “I see poorly constructed nets… everywhere.” The key difference is in the frame construction and net quality. A sturdy frame with a tight, high-impact net can turn a hard hit into a routine grounder.
Choosing the right portable mounds is also critical. It’s not just a mound of dirt; it’s a precise tool. The mound heights and slope specs are not just numbers. They help a pitcher develop a healthy motion or risk injury. A mound with the wrong slope or unstable surface can harm a player’s technique and health.
This isn’t about finding the cheapest option. It’s the “Moneyball” approach to youth sports. We’re using data and careful analysis to find gear that offers real value. We’re cutting through the marketing to find what truly protects players and boosts performance.
Age‑Appropriate Mound Heights & Slopes: The Goldilocks Principle
Forget one-size-fits-all. The difference between a 6-inch and a 10-inch rubber mound is huge. It’s not just a measurement; it’s about building a young athlete or breaking one. Choosing the wrong mound is like giving a 10-year-old a major league fastball. It just doesn’t work for their mechanics.
The Goldilocks Principle applies here. A mound that’s too high or too steep for a young arm can lead to injury. On the other hand, a mound that’s too low doesn’t prepare young pitchers for competition. So, how do you find the perfect mound? Start by looking at the league specs that match youth, high school, and pro levels.
The table below shows the standard specs. These are not suggestions but the result of years of research. They protect young arms while teaching proper mechanics.
| League / Level | Mound Height | Slope (Rise:Run) | Rubber to Plate Distance | Primary Goal |
|---|---|---|---|---|
| Youth (Little League, Youth Travel) | 6 inches | 1-inch drop per 1 foot | 46-50 ft (varies by age) | Safety & Mechanics Foundation |
| High School (NFHS) | 10 inches | 1-inch per foot (standard) | 60 ft, 6 in. | Transition to Regulation Play |
| College/Pro (NCAA, MiLB, MLB) | 10 inches | 1-inch per foot (1:12 slope) | 60 ft, 6 in. | Competition & Velocity |
Why is a small slope so important? It’s about physics, not just being picky. The slope affects a pitcher’s stride, release point, and throwing angle. A 10-inch mound for a 12-year-old is too hard. It puts too much stress on their shoulders and elbows.
Choosing the right frame materials for your portable mound is key. A flimsy frame won’t keep the slope steady for young pitchers. You need a strong, stable structure. The net gauge of your L-screens and nets is also critical. A weak net can’t stop fast foul balls, making practice dangerous.
Choosing the right mound is more than just following league rules. It’s an investment in a young athlete’s health and skills. Using a 10-inch mound for youth is like using a sledgehammer to hang a picture. It’s overkill and can ruin their mechanics. Get the height and slope right, and you’re building a career, not just a pitcher.
Mound Build: composite vs foam, wheels/handles, turf wrap
The pitcher’s mound is like a throne on the diamond. It must be mobile, sturdy, and ready for action. Choosing the right mound isn’t just about picking a rubberized dirt hunk. It’s about the core materials that define its soul.
Foam is like the lightweight, easy-to-move starlet of materials. It’s light, easy to move, and affordable. But, it can dent under pressure. Composite, on the other hand, is the reliable friend. It’s strong, silent, and less likely to dent.
Choosing between foam and composite depends on your league’s personality. Are you a “fast and light” T-ball league, or a “built to last” high school varsity squad?
| Feature | Composite Mound | Foam-Core Mound |
|---|---|---|
| Durability | High-density, multi-layered. Resists denting, chipping, and weather. | Lightweight and forgiving, but can be dented by cleats or hard impacts. |
| Weight | Heavier, more stable, but less portable. | Light as a feather (comparatively). A 2-piece foam mound can be moved by one person. |
| Cost | Higher initial investment. | More budget-friendly upfront. |
| Feel | Firmer, more authentic “mound-like” feel. | Softer, can feel less “real” to a pitcher. |
A portable mound that can’t be moved is useless. Wheels and handles make it mobile and sturdy. A good wheel kit and handles can turn a heavy mound into something easy to move.
This makes setting up the mound fast. A mound with smart wheels and handles can be ready in minutes. You’ll also need to secure it with tie-downs for safety.
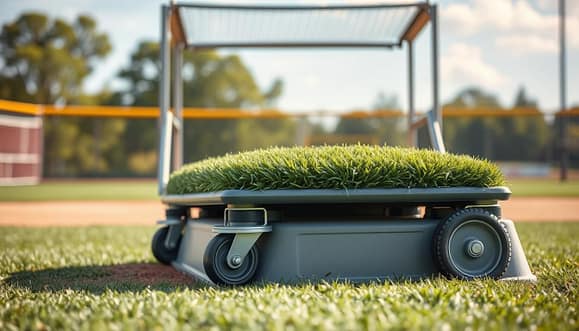
The turf wrap is like the mound’s suit and tie. It’s not just about looks. A good turf wrap provides a consistent, non-slip surface that feels like a real mound.
Building the right mound is a balance. It’s about choosing the right core, making it mobile, and dressing it for success. The right equipment improves the game and elevates it in youth sports.
L‑Screens: frame steel vs aluminum, cut‑out size, wheel kits
Choosing the right L-Screen is more than just buying a piece of equipment. It’s about picking a protector for your pitcher. The right screen is strong and steady. The wrong one can hurt a young player’s confidence.
We’re not just picking a piece of gear; we’re choosing a shield. Let’s look at the three key things: what it’s made of, its shape, and how it moves.
The Frame: Steel’s Grit vs. Aluminum’s Grace
Your first choice is the frame. It’s like choosing between Optimus Prime and Bumblebee in the baseball world.
Steel frames are like Optimus Primes. They’re tough and can handle fast pitches all season. But, they’re heavy and hard to move.
Aluminum frames are like Bumblebees. They’re light, easy to set up, and won’t rust. But, they might not stop the hardest pitches.
Cut-Out Size: The Window to the World
The cut-out in the screen is important for safety and training. It’s not just a hole; it’s a strategic window.
- Large Windows: Give the pitcher a clear view of the batter and catcher. This is good for fielding bunts. But, it means less protection.
- Smaller Windows or “Portholes”: Offer more protection. This is best for young or inexperienced pitchers. But, they see less of the field.
It’s like choosing between a big windshield and a strong viewport. One shows everything; the other protects more.
Wheel Kits: From Anchor to Agile in Seconds
A good wheel kit turns your L-screen into a mobile fortress. Without it, moving a steel screen is hard. With it, one coach can easily move a heavy screen.
Look for kits with big, pneumatic tires for dirt or grass fields. This makes moving the screen easier and impacts storage strategy.
The Non-Negotiable: Weld Inspection
Inspecting the welds is key. A screen’s strength depends on its welds. Check every joint and seam before buying.
A good weld is smooth and strong. A bad weld can fail. Always check the welds when the screen arrives.
Choosing an L-Screen is an investment in safety and performance. Pick a strong frame, the right cut-out, and always check the welds. Your pitcher’s safety and your peace of mind are worth it.
Netting Gauge & Replacement Panels, tie-downs, anchors
Your netting system is like the defensive line of your practice facility. It’s not just a backstop; it’s the last line of defense against fast-moving projectiles. Choosing the right net gauge and securing it like a fortress is key. This makes your practice calm and productive, not chaotic and gear-chasing.
More Than Just String: Decoding Net Gauge & Mesh
That green mesh at the hardware store for keeping birds off your berries? It won’t last a single batting practice. We’re talking about a system that must withstand thousands of high-velocity impacts. The net gauge—the thickness of the twine—and the weave density are your first line of defense.
A flimsy net is a sieve. A quality net is a fortress wall. The difference is in the specs. Look for UV-treated, double-stitched nylon with a minimum 42″ square mesh. Anything less is asking for a stress point to become a gaping hole.
Choosing Your Net: Gauge & Mesh Comparison
| Mesh Type | Gauge (Thickness) | Mesh Size | Best For | Durability Rating |
|---|---|---|---|---|
| Standard Polyethylene | Light (1.5-2mm) | 2″ Square | Low-velocity drills, youth practice | ★★☆☆☆ |
| Braided Nylon (Standard) | Medium (2-3mm) | 1.75″ Square | High School / Cage Backstops | ★★★☆☆ |
| Knotted Nylon (Heavy Duty) | Heavy (3-4mm) | 1.5″ Square | Varsity/College BP, High-Impact Areas | ★★★★☆ |
| Knotted Polyester (Pro-Grade) | Heavy-Duty (4mm+) | 1.5″ to 2″ Square | Professional cages, high-use facilities | ★★★★★ |
Tie-Downs & Anchors: Your Anti-Kite System
Your net could be made of mythical dragon-scale, but without proper tie-downs and anchors, it’s a very expensive, very large kite waiting for a good gust. This isn’t about tying a knot and hoping. It’s about engineering.
Anchors: The Unsung Heroes
Ground stakes are for tents and beach umbrellas. For a net that must withstand line drives and high winds, you need a serious ground anchor system. Think of ship anchors: they don’t just sit on the seafloor; they dig in. Auger-style anchors that screw into the ground provide immense vertical and lateral stability, preventing the “tumbleweed effect” during a sudden storm or a high-velocity impact.
A high-quality, 60-foot deluxe nylon cage net is a perfect example of a product designed with this in mind, featuring reinforced grommets and D-rings for secure, multi-point tie-downs. It’s not just about strength; it’s about distributed force. The right system uses multiple anchor points and tension lines to turn a flapping sail into a taut, resilient wall.
The Setup: From Floppy to Fortress
First, lay the net flat and identify all anchor points. Use ratchet straps or heavy-duty bungee cords with a minimum 1-inch width for your tie-downs. Connect them to heavy-duty ground stakes or screw-in anchors at a 45-degree angle away from the net. This creates a triangulated, opposing force system. The goal isn’t just to hold it down, but to pre-tension the entire net evenly, like the head of a drum.
Inspect every grommet and D-ring. A single weak point will find the stress. Then, walk the perimeter. A properly anchored net shouldn’t have a “flappy” section. If it billows in the wind, your tie-downs need more tension or better anchors. Remember, a net under proper tension is a safe, quiet, and long-lasting net.
Setup/Teardown Times & Storage Footprint
Imagine it’s 7:00 AM, and the dew is on the grass. You, the coach, are holding a lukewarm coffee. Your team is buzzing with excitement, ready for the game. But you’re stuck on minute eight of a 15-minute setup that was supposed to take five.
This is the Frustration Quotient of sports logistics. It’s about lost minutes and focus. The clock is ticking, and so is your team’s energy.
The biggest innovation in portable mound and screen logistics is the wheel. A wheel kit can cut setup times from over 5 minutes to under 60 seconds. This isn’t just a small advantage; it’s the difference between a focused team and a distracted one.
Let’s talk about the physics and footprint of a portable pitcher’s mound. It’s not light, weighing between 130 and 220 pounds. Without smart design, moving it is like relocating a boulder.
Design matters here. Two-piece mound designs are easier to move, fitting into a large suitcase when disassembled. But a one-piece design is a different story, needing a lot of space.
Efficiency in setup and storage footprint are key. Here’s a comparison of a typical practice session setup:
| Equipment | Setup Without Wheel Kit | Setup With Wheel Kit | Storage Footprint (Disassembled) |
|---|---|---|---|
| Portable Pitching Mound | 5-8 minutes (2 people) | High (One-piece: 4′ x 4′ x 1.5′) | |
| L-Screen | 3-5 minutes | 1-2 minutes | Moderate (Folds to 6″ deep panel) |
| Batting Cage Netting System | 15-20 min (multi-person) | N/A (Stationary) | High (Large, heavy rolls) |
To win the logistics game, think like a minimalist. Focus on designs that are easy to set up and store.
- For the mound: Choose two-piece, wheel-kit-ready designs. A 60-second setup from storage to mound is a game-changer.
- For L-screens: Look for models with quick-lock frames and wheel kits. A screen that rolls into place is one that gets used more.
- For nets: Invest in a quality reel system. A reel keeps the net organized, making setup quick and easy.
The goal is to make equipment serve the practice, not the other way around. The best storage footprint is one you don’t have to think about. It should fit easily in a corner, not take over the room.
That coach with the cooling coffee? He should be coaching, not managing facilities.
Inspect & Maintain: welds, tears, fasteners
Forget the oil can and the bored sigh. Inspection and maintenance are not chores; they are the quiet, daily rituals that separate the functional from the failed. This isn’t about fixing broken gear—it’s about listening to the whispers of your equipment before they become screams. Think of it as preventative medicine for your gear, a way to honor the samurai’s sword or the watchmaker’s lathe. The difference between a season-ending catastrophe and a season of smooth play is often a single, overlooked detail.
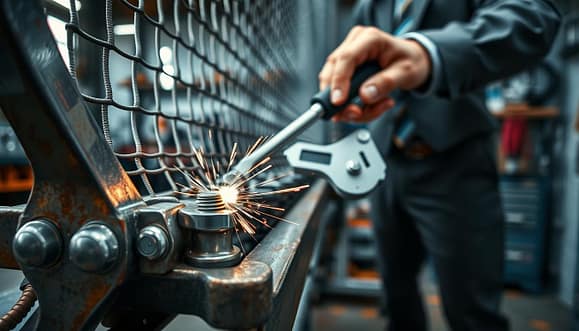
Consider the humble weld. A good weld is a promise, a molecular handshake between two pieces of metal. A weld inspection isn’t just a glance; it’s a forensic analysis. You’re not just looking for cracks. You’re looking for the hairline fractures that whisper of things seen.
A cracked weld isn’t a flaw; it’s a story. It’s the split-second of maximum torque, the vibration of a hundred pitches, the silent testimony of a season’s labor. Run your fingers along the seam. Is it a smooth, continuous bead, or does it have the pitted, cratered look of a rushed job? That’s your first clue.
Nets and fabrics tell a different tale. A tear inspection is an autopsy on a thread. You’re not just looking for a hole; you’re looking for the story of the stress. Quality netting wears out like a good pair of jeans, not with a bang but a series of slow, surrendering whispers.
Look for the stress points: the corners of the frame, the points where the net attaches, the high-tension areas. Poor quality netting will fray and give up quickly, announcing its failure like a bad actor. A high-quality net will show stress differently—maybe a single, strained thread in a sea of integrity. That’s your canary in the coal mine.
Lastly, we arrive at the symphony of the fastener torque. This is watchmaker territory. A loose bolt is a traitor in your midst, a single point of failure in a system that demands harmony. Checking fastener torque isn’t about brute force; it’s about precision. It’s the difference between a snare drum head tuned to perfection and one that just… rattles.
Each bolt, nut, and wingnut has a sweet spot. Too loose, and the whole structure becomes a chattering, wobbly mess. Too tight, and you risk stripping threads or warping a frame. It’s a ritual of care, a quarterly tightening with a torque wrench, not a wrenching with a grunt and a prayer.
Here’s a quick checklist for your pre-game ritual:
| Component | Inspection Point | What to Look For |
|---|---|---|
| Frame Welds | All welded joints, specially at stress points and corners. | Hairline cracks, rust bubbling under paint, or pitting in the metal. |
| Netting & Fabric | Seams, grommets, and points of contact with the frame. | Fraying, broken threads, stretched or torn mesh, UV degradation. |
| Fasteners | All bolts, nuts, wingnuts, and connection points. | Rust, corrosion, stripped threads, or any sign of movement or “walking out.” |
| General Structure | Overall frame alignment and stability. | Wobble, permanent lean, or any deformation in the frame members. |
This isn’t maintenance; it’s a dialogue with your equipment. You’re not just looking for what’s broken. You’re listening for the story of every scuff, the history in each stress point, and the quiet, reliable click of a fastener at its proper fastener torque. It’s the ritual that turns a piece of equipment into a trusted tool, and a coach into a craftsman.
On‑Field Placement & Throwing Lanes
Think of your baseball or softball field like a chessboard. When placing your L-screen or portable mound, it’s not just about finding a spot. It’s a strategic move that can make your practice safe and productive. This is more than just setting up; it’s the first step in a game of positioning.
Forget the “set it and forget it” way. Good on-field placement shapes the drill’s geometry. Where you put your L-screen affects the whole practice. A screen too close to the plate can block the hitter’s view and limit throwing lanes for infielders. Too far, and the coach or pitcher risks getting hit by a comebacker.
Here’s the strategic thinking, broken down for coaches:
The Sun Tzu of Batting Practice
Sun Tzu might have been great at placing L-screens. He’d have used the Art of War principles for the diamond. Position your L-screen so the sun is behind the hitter or pitcher, not in their eyes. This way, the protective netting acts as a barrier against line drives, not just a decoration. It’s about controlling angles and sightlines, guiding the action into the desired lanes.
Think about the drill. Ground ball drills need different throwing lanes than fly-ball drills for outfielders. Your on-field placement must create scenarios that are realistic and repeatable. A screen behind the pitcher is for bullpen sessions. A 45-degree angle to the plate simulates a right-handed pull hitter. Every angle tells a story.
The Chessboard of Safety and Sightlines
This isn’t just about the batter. It’s about the coach, the pitcher, and players shagging balls. Proper on-field placement makes a safe, defined area. The L-screen protects your most valuable piece—the coach or the pitcher. The throwing lanes for infielders must be clear of obstacles and other players. A misaligned screen can turn a routine grounder into a safety risk.
Here’s a quick guide to key placement zones:
- The Safety Cone: The L-screen is the coach’s castle. It must be placed so the coach has a full view of the hitter and field, with a clear path to leave.
- The Batter’s Sightline: The hitter should never look directly into the sun or a light standard. Position the screen and the hitter’s “cage” for the best vision.
- The Funnel: Think of the ideal throwing lanes as a funnel. The screen is the wide mouth, and the target is the spout. Position your fielders and screen to create a natural channel for the ball.
Smart on-field placement is the first, often overlooked, coaching decision. It’s the difference between a chaotic scrimmage and a precise drill. It’s not about where the equipment fits; it’s about where it fits into your strategy. Place your pieces wisely.
Safety Protocols: coach/athlete positioning
Forget the chalkboard. The most important plays in youth baseball and softball are drawn in the safety margins. It’s not about wrapping players in bubble wrap. It’s about building a culture of awareness as intentional as a double-play turn.
Your coach positioning is your first and most dynamic line of defense. You are not a spectator. Your spot on the field during drills is a strategic choice, placing you as a living barrier between a line drive and a player.
Equipment isn’t just gear; it’s hardware with a service record. This is where your maintenance logs transform from a chore into a shield. That L-screen didn’t just “get a dent.” A weld was stressed last Tuesday. That mound’s turf wrap didn’t just “wear out”; it started fraying after the last tournament.
The final protocol is cultural. It’s the coach who stops a drill to reposition a screen, who notes a frayed net grommet, who makes a player re-tie their laces. It’s the boring, meticulous work that never makes the highlight reel. It’s the quiet confidence of knowing every piece is in its right place.