When we talk about youth baseball strength, we often picture a young athlete lifting heavy weights. But is that the best way to hit a home run? No, it can actually lead to injuries.
Instead, we should focus on the art of movement. Can a young player move well in different ways? That’s where the magic is. It’s not just about lifting; it’s about becoming adaptable athletes.
The foundation is the 5 Basic S’s of Training: Stamina, Strength, Speed, Skill, and Suppleness. For 9-14 year olds, strength training must fit their age and growth. The aim is to make athletes move like dancers and sprint like sprinters.
Remember, the barbell is a tool, not a trophy. Focus on technique and movement quality, not just weight. For more on structuring workouts, check out this resource on strength training for youth.
Readiness Screen: Simple Overhead Squat and Shoulder Mobility Checks
Before we start any exercises, let’s see how well an athlete moves. The overhead squat is like a test to see if they’re ready. Watching a 14-year-old shortstop try this squat shows if they’re moving right. If they’re not, it’s clear they have a movement literacy problem.
For throwers, checking their shoulder mobility is key. They need to move their shoulders smoothly, like a pro. If they can’t do this, giving them heavy weights is not training—it’s dangerous.
This test isn’t to judge; it’s to guide. It shows us which mobility for throwers exercises are most important before we talk about speed.
| Assessment | Key Indicators | Action Required |
|---|---|---|
| Overhead Squat | Heels rising, chest caving, lower back arching | Focus on improving movement literacy |
| Shoulder Mobility | Scapular winging, limited rotation | Implement targeted mobility drills |
| Overall Readiness | Movement compensations | Develop a tailored training plan |
By focusing on these basic tests, we can build a solid base for our athletes. To learn more about arm care, check out this insightful article.
Warm Up Recipe: RAMP—Raise, Activate, Mobilize, Potentiate in 10 Minutes
A dynamic warm-up is more than just a routine. It’s the key to unlocking your best athletic performance. Forget about slow laps and static stretches that can actually hurt. Instead, try the RAMP protocol, a simple yet effective method that even kids can follow.
First, we Raise the heart rate and body temperature. Activities like skipping, shuffling, or playing tag are perfect. They get your body moving and ready for action.
Next, we Activate the muscles that often sleep in. We’re talking about your glutes, deep hip stabilizers, and rotator cuff. Mini-band walks and prone Ys are great for waking these muscles up.
Then, we Mobilize the joints that need to move freely. We focus on hips, T-spine, and ankles. Controlled articular rotations help keep everything moving smoothly.
Lastly, we Potentiate the nervous system. Short bursts of movement, like pogo jumps or quick sprints, get you ready for explosive actions. In just ten minutes, you’ll be fully prepared to perform at your best.
| Phase | Activity | Purpose |
|---|---|---|
| Raise | Skipping, Tag | Increase heart rate and body temperature |
| Activate | Mini-band walks, Prone Ys | Engage key muscle groups |
| Mobilize | Controlled rotations | Enhance joint mobility |
| Potentiate | Pogo jumps, Sprints | Prepare for explosive movements |
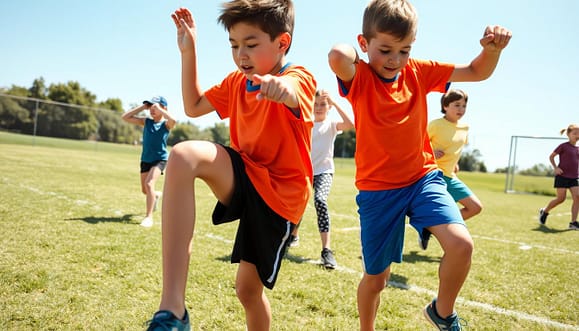
Speed Mechanics: Wall Drills, Wickets, Flying 10s, Timing, and Games
Imagine a race where the winner isn’t just the fastest but the one who masters the art of acceleration—welcome to speed mechanics. In baseball, speed is more than just a number; it’s a skill that needs to be honed through engaging drills. For young athletes aged 9 to 14, this is a critical time to develop that explosive quickness.
For boys, the first speed training window opens between ages 7 and 9, while girls see their first window from ages 6 to 8. But the real magic happens in the second window, from ages 13 to 16 for boys and 11 to 13 for girls. This is prime time for cultivating a high-frequency, elastic stride that can transform a player’s game.
We start with wall drills to teach the essential shapes of sprint mechanics. The focus is on a rigid front-side knee drive and a stiff ankle. This technique eliminates the common issue of “reaching” with the backside, which often makes kids look like they’re running in quicksand. Next, we progress to wickets—low hurdles that force athletes to cycle their legs correctly under the hip, not behind it.
Now, let’s talk about flying 10s. This drill involves a 20-yard build-up leading into a 10-yard max-effort sprint. It’s here that athletes learn to transition from acceleration to an upright, relaxed top speed without the dreaded handbrake on. But what really sets this training apart is the element of timing and games.
Racing against a partner or chasing a dropped tennis ball turns the mechanics into a reflexive action. When the brain is focused on winning the game, the body stops overthinking and just executes. That’s when you see a kid go from looking like a newborn giraffe to a sleek, efficient predator on the field.
Incorporating fun and competitive elements into speed mechanics not only enhances performance but also keeps young athletes engaged. So, let’s make speed training a game, because who doesn’t want to feel like a champion while sprinting toward home plate?
Strength Menu: Push, Pull, Hinge, Squat, Carry, Medicine Ball, and Core Anti-Rotation
The strength menu is more than a list; it’s a plan for young athletes. It focuses on building a strong base, not just a big lift. Boys hit their peak strength 12 to 18 months after they stop growing tall. For many in the 9-14U group, we’re just starting.
Let’s look at the six key areas of this strength menu:
- Push and Pull: These are key for a balanced upper body. Think of push-ups and rows, not just bench presses. We want shoulders that can handle and absorb force well.
- Hinge and Squat: These are the heart of lower body strength. We use goblet squats and kettlebell deadlifts. We focus on good posture, not just how much you can lift.
- Carries: Carries, like the single-arm farmer’s carry, are often ignored. They help build the core stability needed for sports like baseball.
- Medicine Ball Throws: These exercises connect the gym to the game. They teach how to transfer force from the ground up.
- Core Anti-Rotation: Exercises like Pallof presses and dead bugs are key. A strong swing isn’t about twisting, but resisting twisting at the right time.
This isn’t just any workout; it’s a carefully planned menu. It builds strength on a growing body. By focusing on these areas, we prepare young athletes for their sport. We make sure they build strength that helps them perform better on the field.
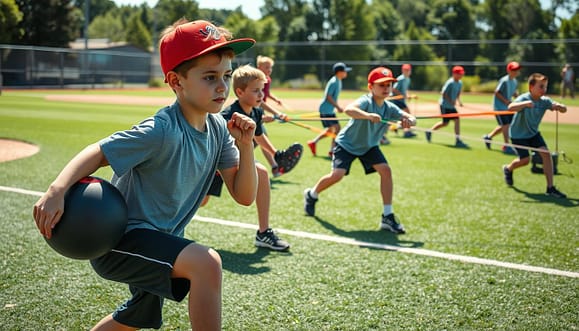
Thrower Mobility and Stability: T-Spine, Hips, Scapular Control
Imagine trying to fire a cannon from a canoe—it’s impossible. This is what happens when throwers lack mobility. The T-spine and hips are key for a thrower’s performance. If these areas are stiff, the arm has to compensate, leading to injuries and poor mechanics.
Being flexible is not just a buzzword; it’s essential. The best time to train flexibility is between ages 6 and 10. But during the chaotic phase of peak height velocity (PHV), flexibility becomes a rescue mission. A 13-year-old, suddenly three inches taller, might lose his fastball command. This is because his thoracic spine locks up and his hips become tight.
We start with T-spine extension and rotation drills. These exercises open up the rib cage, providing a stable, mobile platform for the scapula to glide on. Scapular control is the difference between a healthy UCL and a surgical scar. We train the serratus anterior and lower traps to fire on command, anchoring the shoulder blade to the back.
And let’s not forget the hips. A tight lead hip blocks the entire kinetic chain, forcing the arm to pick up the slack. We drill hip internal rotation and extension like our lives depend on it. Because, for a young pitcher’s career, it just might.
This isn’t just stretching; it’s a targeted intervention to reclaim the range of motion that growth spurts steal away. Below is a table summarizing essential mobility exercises for throwers:
| Exercise | Target Area | Benefits |
|---|---|---|
| T-Spine Rotations | Thoracic Spine | Improves rotation and reduces shoulder strain |
| Hip Flexor Stretch | Hips | Enhances hip mobility and reduces tightness |
| Scapular Wall Slides | Scapula | Increases scapular stability and control |
| Internal Rotation Drills | Hips | Improves hip mobility and kinetic chain function |
In conclusion, mobility for throwers isn’t just an afterthought; it’s a fundamental component of their development. Prioritizing T-spine, hip, and scapular mobility can set young athletes on the path to success. So, let’s ensure they have the artillery they need to launch their dreams!
In-Season Micro Dose: 15 to 20 Minutes, Two to Three Days Per Week
Training during the season is like walking a tightrope. Every minute is precious. We aim to keep the strength and speed built in the off-season. The micro dose method is all about being efficient. It involves 15 to 20 minutes, two to three times a week, to keep you ready without overdoing it.
During the season, athletes face games and practices non-stop. Our task is to add a counter-stimulus to keep your gains. It’s like a quick espresso, not a full cup of coffee. A typical session includes a five-minute warm-up, a lower-body exercise like a trap bar deadlift, an upper-body pull, and a core drill.
We’re not after soreness; we aim for readiness. This method is great for athletes coming back after a minor injury or a long tournament. It’s an active recovery tool. It lets us check your range of motion and strength safely. It’s like a regular tune-up for your sports car.
Off-Season Blocks: Capacity, Strength, Power, and Speed
The off-season is a key time to improve a young athlete’s skills. It’s not just for rest; it’s for growth. We plan training blocks to make the most of each phase.
The first block is Capacity. It’s about getting physically ready and building endurance. For a 14-year-old boy, this is a critical time to improve.
Next, we move to the Strength block. We work on basic movements and strengthen tissues. Younger athletes start with bodyweight exercises, while older ones can use weights.
The Power block follows. We focus on explosive movements like medicine ball throws. This phase shows the results of the previous blocks.
Lastly, we have the Speed block. It’s all about improving sprinting and quick reactions. This ensures all hard work pays off on the field.
This method respects the body’s natural growth. It’s not just about today’s workout. It’s about being ready for the future.
Monitoring Wellness: RPE, Sleep, Soreness, and Jump Tests
Monitoring an athlete’s wellness is key, not just a part of training. It’s the heart of good coaching. In a world where numbers matter a lot, listening to what athletes feel is just as important. This is even more true for teenagers, who might not always share how they’re feeling.
I use a simple wellness check that takes just 30 seconds. It asks about how hard they worked the day before, how much sleep they got, and how sore they are. If someone says they worked hard but didn’t sleep much because of video games, it’s a bigger issue than just training. Lifestyle problems can stop progress faster than injuries.
We also do a simple jump test to check how tired they are. This test uses a special plate or even a Vertec. If their jump height goes down, it might mean they’re too tired. This info helps teach them how their choices affect their performance.
Knowing these things is key for safely letting athletes play again. If they’re physically okay but not mentally ready or feeling stressed, they’re not ready. The numbers show us a lot, but they don’t tell everything. It’s the talk about those numbers that really teaches them.
In today’s training world, we need to see the whole athlete. This way, we can make sure they’re ready to play again, both in body and mind.
Safety Rules: Supervision, Technique, Load Progressions, and Red Flags
Safety is key in youth strength and conditioning. Always supervise young athletes. An 11-year-old alone in a weight room is risky. A coach should be there to guide and watch over them.
Technique is also vital. Focus on perfect form over heavy weights. A well-done bodyweight squat is more valuable than a bad back squat. Increase weights slowly. Think of it as building a skyscraper on a foundation that’s drying.
The “2-for-2” rule helps decide when to add weight. If an athlete can do two more reps in their final set for two days in a row, it’s time to increase the weight. But always be patient.
Knowing the red flags is important. Sharp pain is a stop sign. A dull ache that goes away during warm-up is a yellow light. The biggest red flag is ignoring a kid who says their arm feels funny.
A good dynamic warm-up, like the RAMP protocol, prepares the body and checks for issues. If a young athlete has trouble with a hip hinge during warm-up, it’s time to adjust the session.
Safety is more than a checklist. It’s the foundation for years of athletic growth. By following these rules, we create a safe space for kids to grow and learn without fear of injury.